Wix provides you with a lot of flexibility regarding design and layout. However, when it comes to changing your existing site template, things can become a bit complicated. Currently, Wix doesn’t offer any feature through which you can switch your website templates. But, if you’re reading this, you are definitely expecting an answer to whether there is any other way to work around changing your site’s templates on Wix.
Well, there is surely a way, but to do this, start by creating a new website on Wix, where you can select the template of your choice. Then, copy and paste the content onto your new website. Once you finish that, you can work around adjusting your content to match the design as well as the style of the new template.
It surely does sound like a lot of work, but you can complete this task within a few minutes, thanks to the improved Wix editor. So, let’s start with this walkthrough of how to change the Wix template on your current website, including screenshots.
What You Can Transfer And What You Can’t On Your Wix Website?
We did mention that there is currently no feature on Wix that can help you switch your existing site’s template. And the only way to change this template is to create a new website. You can transfer your website content and premium plan to this new website (we’ll discuss how to transfer it later).
However, with a fresh template, it’s impossible to completely transfer all your current website content to the new site. There are some features that are transferable, while some are not. Let’s understand that.
Transferable Features
Following are the features that you can transfer from your current Wix website to another:
Domain
- Head to the “Domains Page.”
- Tap the “Show More” icon.
- Select the “Assign to a Different Site” option.
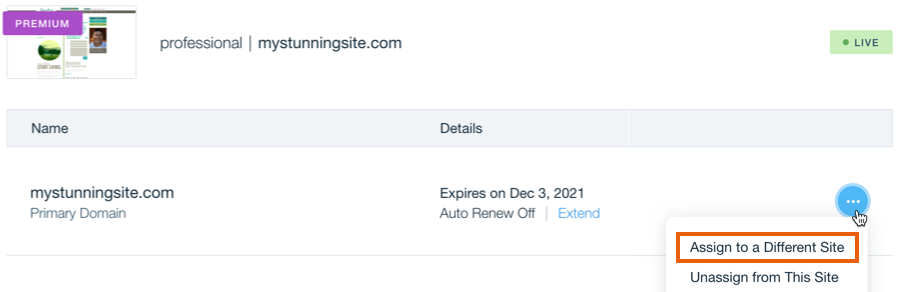
- Choose the website and hit “Next.”
- Select “redirect it to the primary domain” or “replace the current primary domain.”
- Lastly, hit “Assign.”
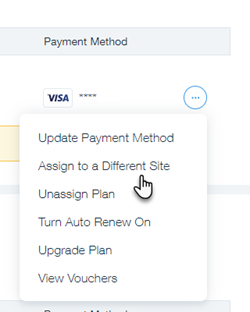
Premium Plan
- Head to the “Premium Subscriptions” section in your account.
- Select the “More Actions” icon right next to the premium plan you want to reassign.
- Tap “Assign to a Different Site.”
- Hit the checkbox next to your new website.
- Press “Next.”
- Finally, tap the “Assign” button to confirm.
Elements And Pages
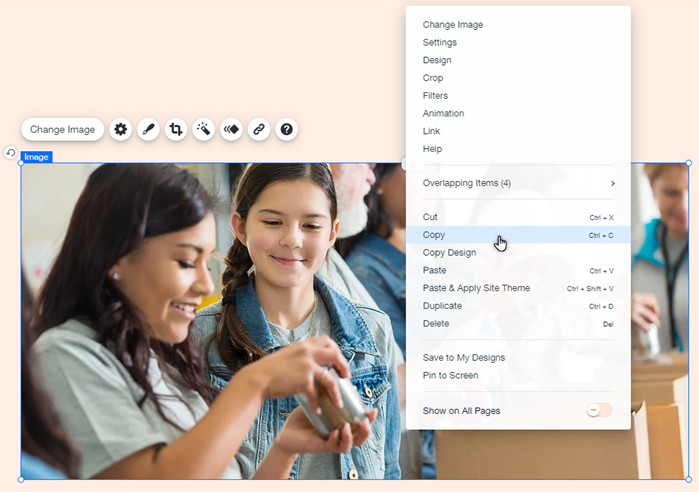
Follow these steps to copy and paste elements to another website:
- Start the Editor with the relevant elements.
- Select the element you like to copy or multi-select multiple elements by dragging your mouse over them or using your keyboard’s “Shift” key.
- Right-click on the elements and select “Copy.” Or press “Ctrl+C” on Windows and “Cmd+C” on Mac.
- Now open the Editor and the page to which you like to paste the elements.
- Paste the element by pressing right-click on your mouse and selecting “Paste.” Or press “Ctrl+V” on Windows and “Cmd+C” on Mac.
- When pasting elements with media files, select “Don’t Upload” or “Upload.”
Follow the steps to copy and paste a page to another website:
- Select “Menus & Pages” on the Editor’s left side.
- Right-click the page and hit “Copy.”
- Open the Editor of your new website where you like to paste the page.
- Paste the page by pressing Right-click on the screen and choose “Paste.”
- Finally, rename the page in the “Pages” panel and press “Done.”
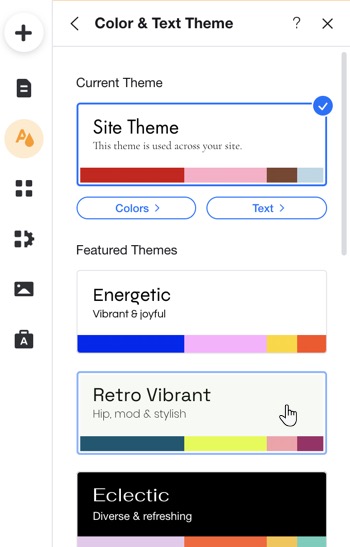
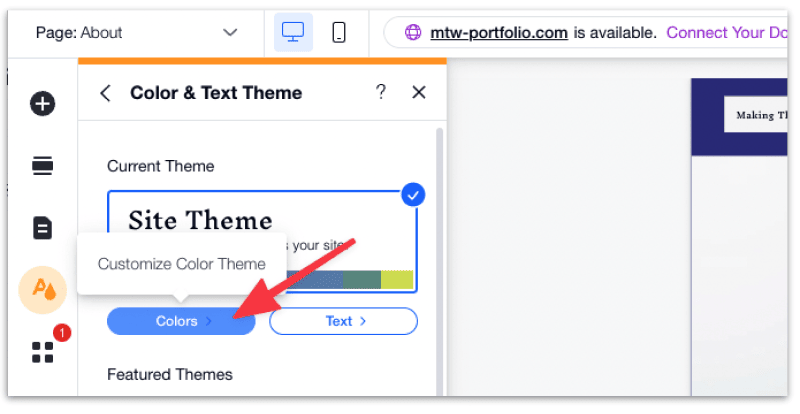
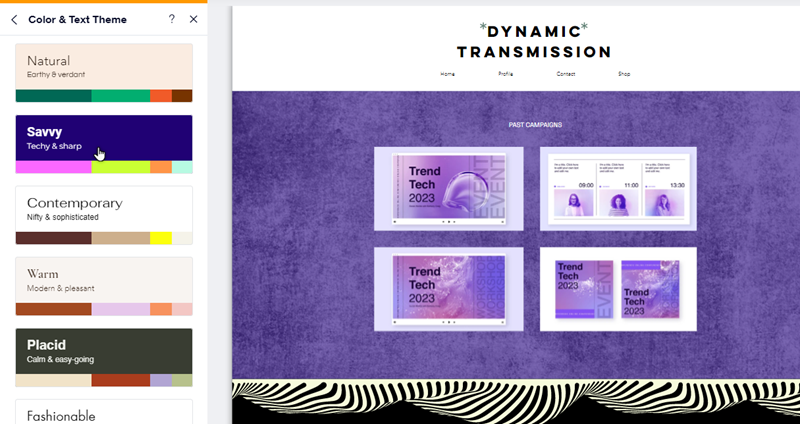
Colors
- Select “Site Design” on the Editor’s left side.
- Head to your “Color & Text Theme” and hit “Customize.”
- Press “Colors” right under the “Current Theme” section.
- Move to your “Color Theme” and hit “Change.”
- Go through the presets and tap to pick a new one
Wix allows you to apply your theme colors to the website’s elements. You can find them in color pickers by looking at the design panels.
Also, the themed elements already carry your theme’s color, saving you time manually adjusting them.
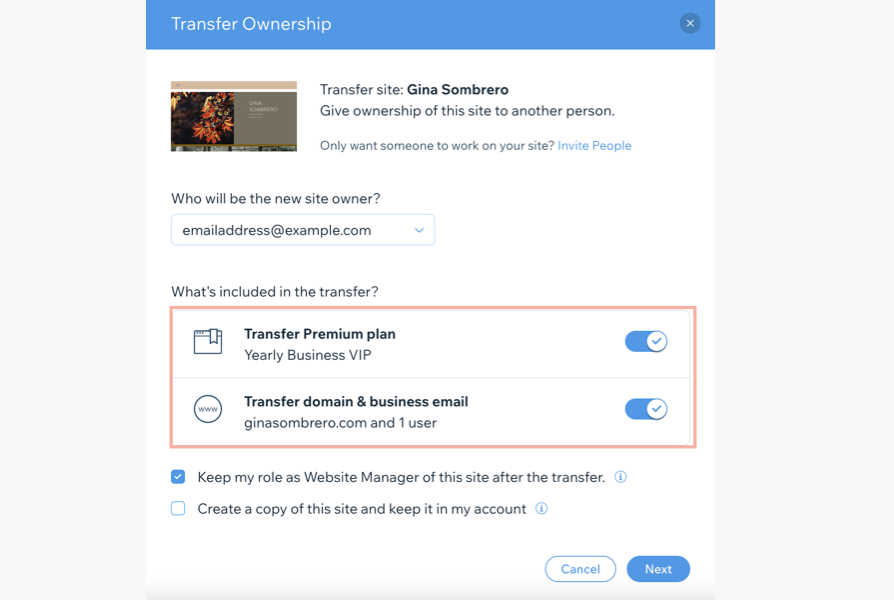
Business Email
- Head to the dashboard of your website.
- Tap “Site Actions.”
- Click “Transfer Site.”
- Enter the details in the “Transfer Ownership” form. Ensure to enable the toggle for both options, i.e., “Transfer Premium plan” and “Transfer Domain & business email.”
Wix Blog
- Head to your new website’s “Blog” section, where you like to transfer the posts.
- From the top right, tap the “More Actions” drop-down.
- Tap “Import posts.”
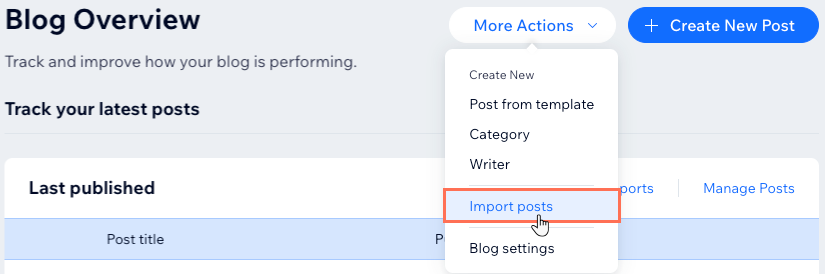
- Click “Wix” and tap “Next.”
- Press “Get Started.”
- Choose the website you like to import the content from.
- Tap “Next.”
- Click the checkbox to confirm your authority.
- Press “Import Posts.”
Ascend Plan And Features
- Head to the “Premium Subscriptions” in the Wix account.
- Tap “Show More” right next to the Ascend plan you want to reassign.
- Select “Assign to a Different Site.”
- Hit the checkbox right next to the relevant website.
- Press “Next.”
- Finally, hit “Assign.”
Fonts
Follow these steps to choose a text theme:
- Select “Site Design” on the Editor’s left side.
- Head to the “Color & Text Theme” and hit “Customize.”
- Tap “Text” right under “Current Theme.”
- Head to the “Text Theme” and press “Change.”
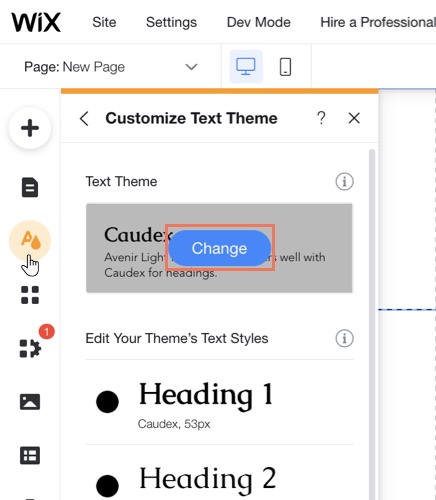
- Pick a different theme.
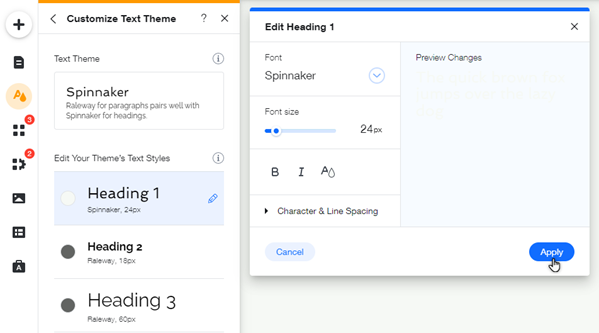
Follow these steps to edit text styles:
- Select “Site Design” on the Editor’s left side.
- Tap “Color & Text Theme.”
- Click “Text” right under “Current Theme.”
- Head to the relevant text style and hit “Edit.”
- Customize the style
- Finally, tap on “Apply” to save the changes.
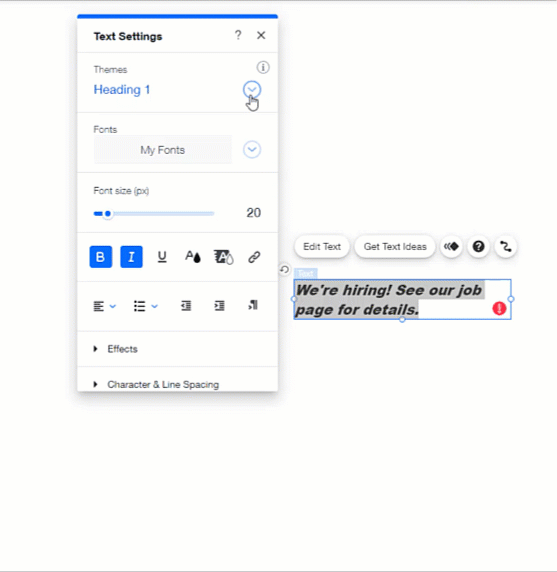
Follow these steps to change the text elements’ style:
- Choose the text box in the Editor.
- Press “Edit Text.”
- Select the “Themes” drop-down menu and choose a theme.
Media
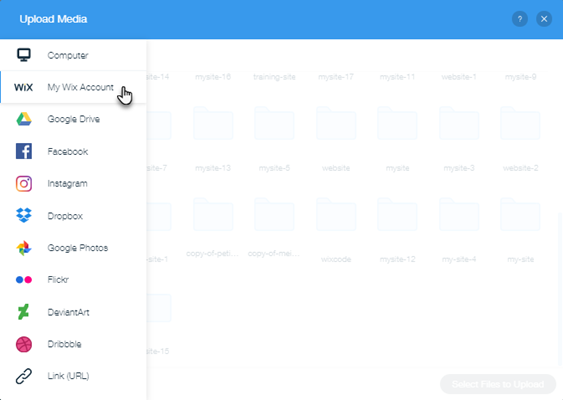
Follow these steps to import media for the Wix sites:
- Head to the Media Manager
- Tap “+Upload Media.”
- Press “My Wix Account.”
- Choose the file you like to import.
- Finally, hit “Select Files to Upload.”
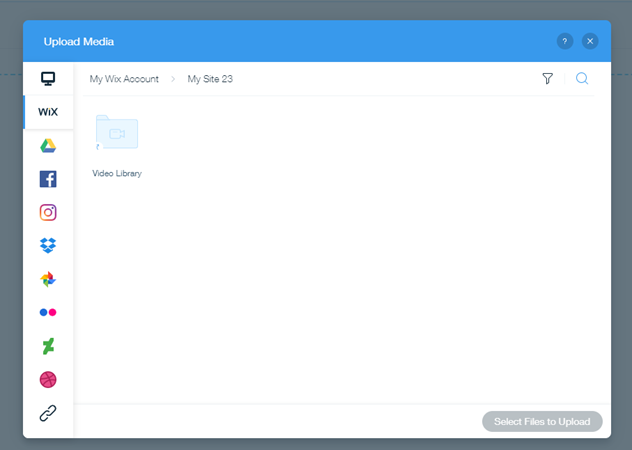
Follow these steps to import Wix video files to another site Media Manager:
- Open your Media Manager.
- Tap “+ Upload Media.”
- Select “My Wix Account” from the left.
- Choose the Site folder you like to import files from.
- Press “Video Library.”
- Select the files you like to upload.
- Finally, hit “Upload Selection.”
Features That Aren’t Transferable
Now, you can transfer the features mentioned above to your new website. However, there are some features that you can’t transfer from your existing Wix website to the new one.
Following are the feature you can’t transfer from one Wix website to another:
- Site Theme, Layout, and Design
- Site Members
- Wix Inbox Messages
- Wix Hotels
- Premium Apps
- Wix Store
- Email Marketing
- Wix Photography Apps
- Premium Apps
- Wix Invoices
- Marketing Integrations
- Wix Video
- Wix Bookings
What Things To Consider Before Selecting A New Template?
Since you want to change the existing template of your Wix website, it’s essential to consider some factors before going with any particular theme. There are surely reasons why you’ll want to change your current website’s template. So, let’s make the right decision for the template this time.
Know Your Style
To make your site’s template shine, you must know your style. Ask yourself about how you want your site to look like. You’ll have to select colors, designs, and fonts. Make sure whatever you choose, it must complement your business, services, or brand. You can also choose from the pre-designed templates that Wix offers to save you time and effort.
What’s Your Website Delivering
Well, we can’t deny the fact that the story of your website plays a huge role in its success. You must know what your website delivers and what it’s about. You can fall under any category, such as a blogging site, photo, art-sharing site, ecommerce site, or something else. Define your website’s purpose before selecting any template for your new Wix site.
What Your Brand Does
Someone visiting your website should get a direct message about what your brand does. So, it’s crucial to design your site in such a way that it compliments your brand. You’ll have to brainstorm through this, as some products work well with simple and minimal designs. In contrast, others demand multiple colors that can shower a playful look. Brand awareness is vital; you must avoid making mistakes while picking a template.
Time Is A Key Factor
Well, if you don’t have much time before launching your website, you should look for a template that carries all the required features. However, if you’re not in any rush, just choose a blank or minimalist template and build your site template from scratch.
How To Change The Wix Template When You Can’t?
So, now you know what to consider before choosing a template for your Wix website. However, how exactly are you going to change templates on the website? Well, here are the steps you must follow to change your Wix template:
- Starting With A New Website With A Fresh Template
- Copying The Existing Website Content To The New Site
- Changing The Font Layout, Style, And Color Of Your Old Content To Suit The New Template
Let’s discuss each of these steps one by one.
Step 1: Starting With A New Website With A Fresh Template
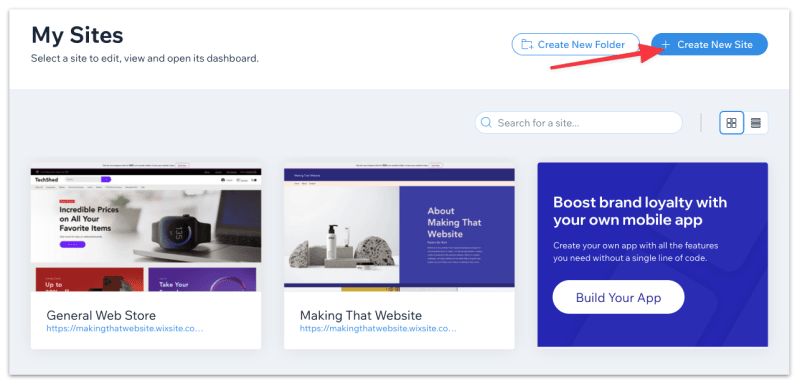
Your first step to changing your Wix template is to create a new website.
- Firstly, open your Wix account.
- Then, select the “Create New Site” + icon.
- Next, follow the usual procedure that is involved in creating a website.
- After that, choose the website type you want to create.
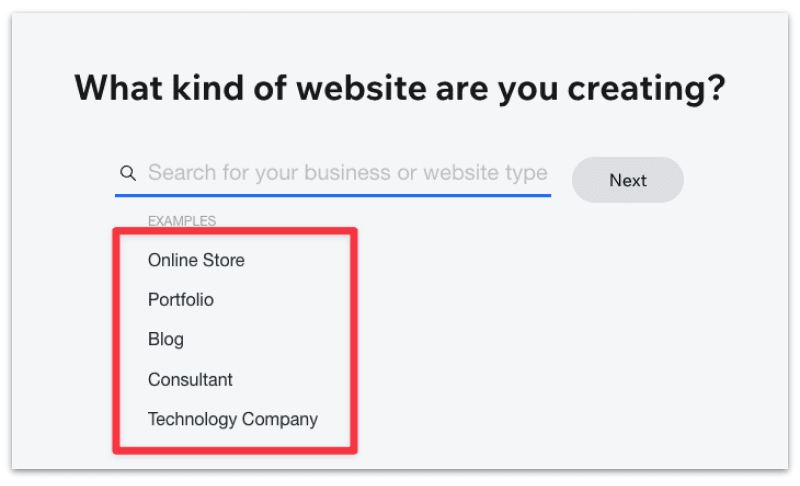
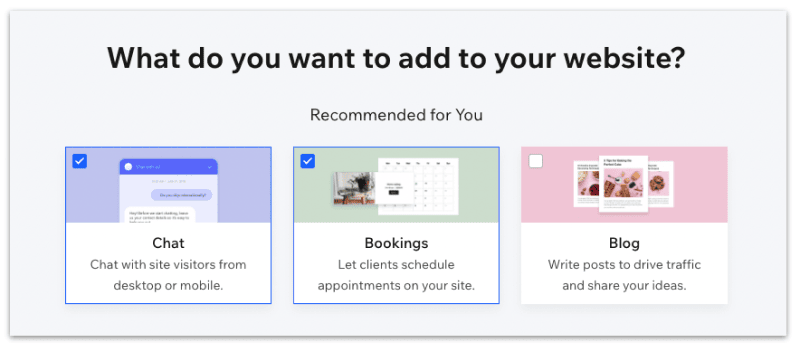
- Now, select the additional pages you want on your website.
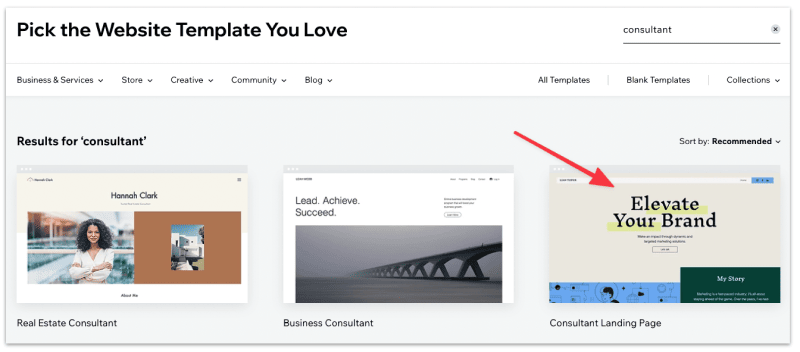
- You need to choose a template to edit.
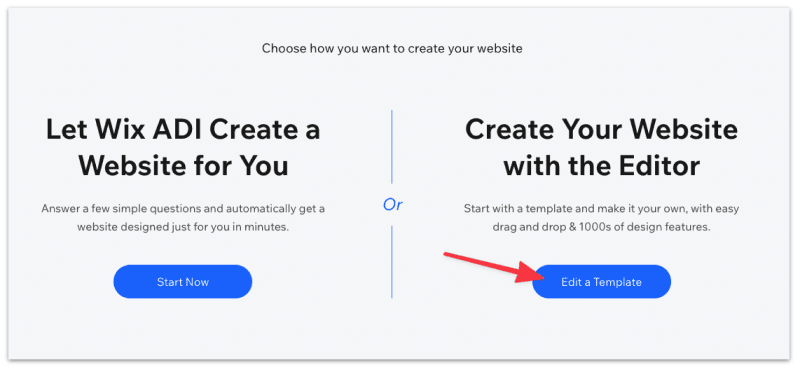
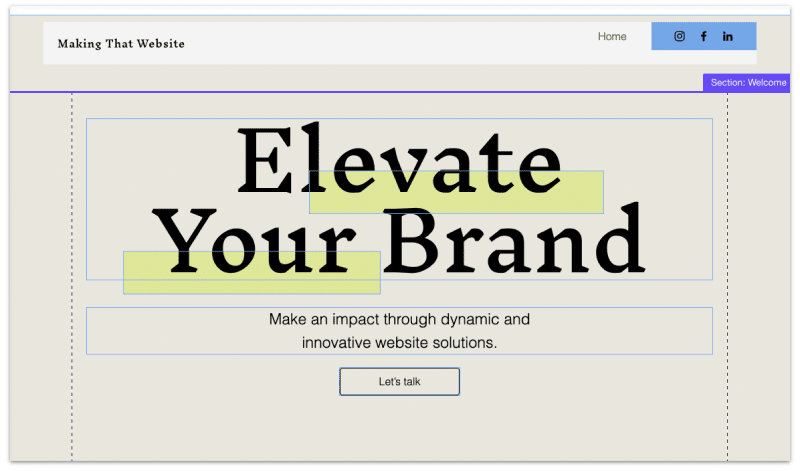
- Select a template you like to switch to. Here we’ll use the consultant landing page template to assist you with an example.
- Go to that template and hit “Edit.”
- You now have a new Wix template you can work with.
Let this tab run in your browser, as we require in the second step.
Step 2: Copying The Existing Website Content And Pasting It Onto The New Site
As discussed, you can’t change your Wix template directly because no such feature is available. So, instead of that, you need to copy the content from your current website and paste it to your new site with the new template. Then, you can customize the changes accordingly.
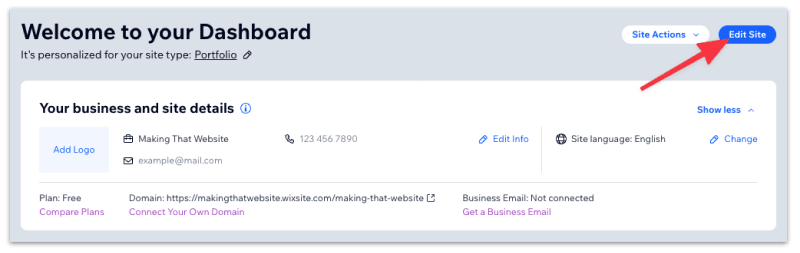
- Firstly, head to your Wix dashboard and edit the current website to which you like to switch the template.
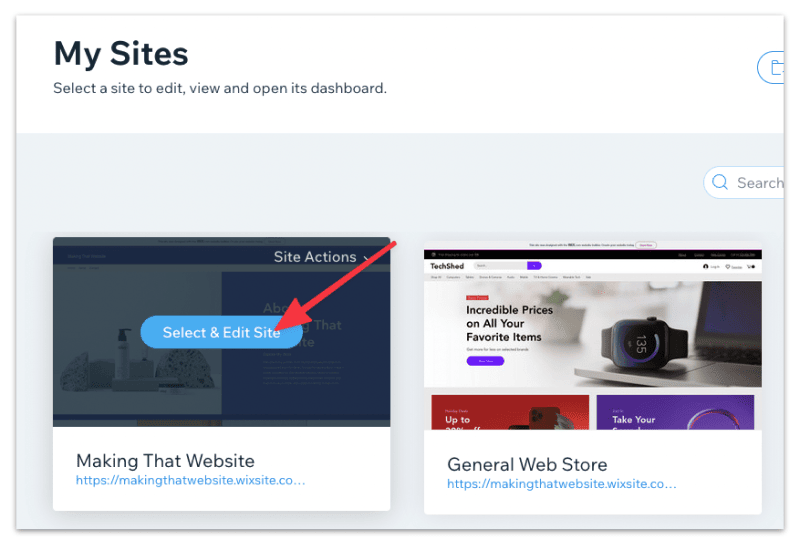
- Then, select the “Edit Site” button from the top right corner.
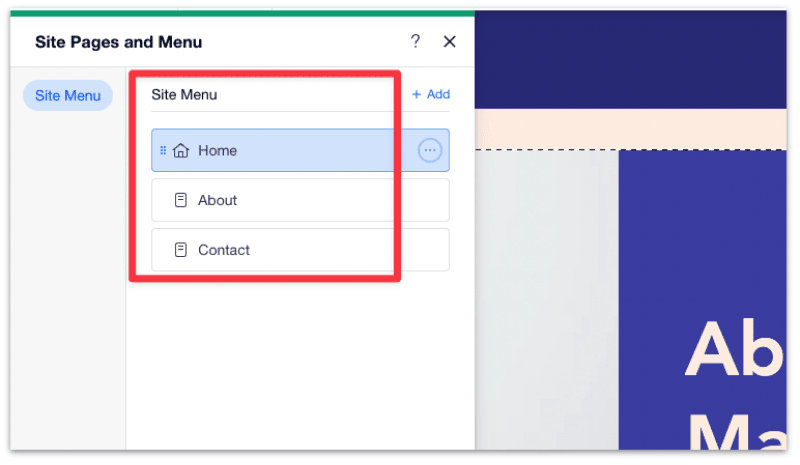
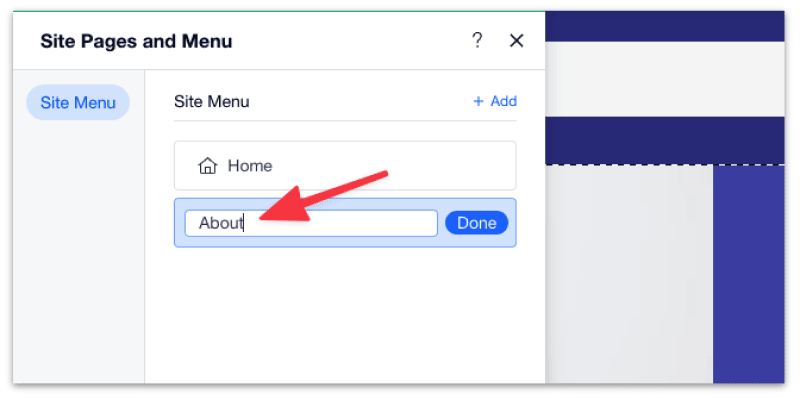
- Next, tap “Pages & Menu” from the sidebar to make the site menu appear in the editor. This menu will have all your current website pages.
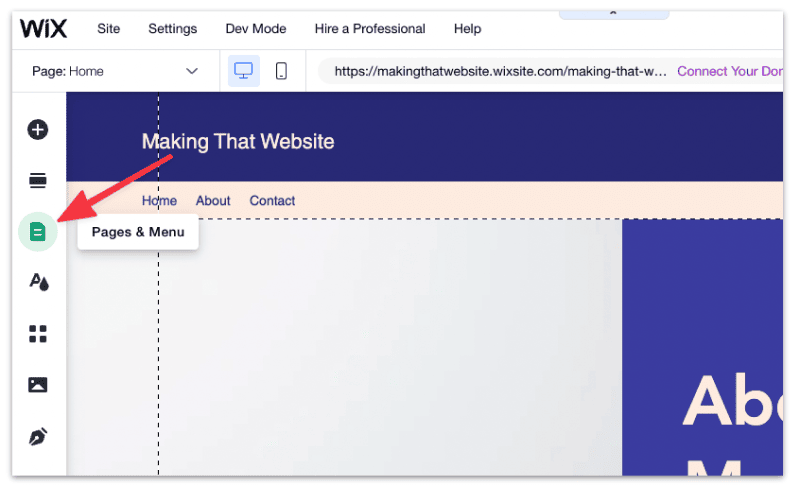
- After that, head to the “Site Pages and Menu” tab.
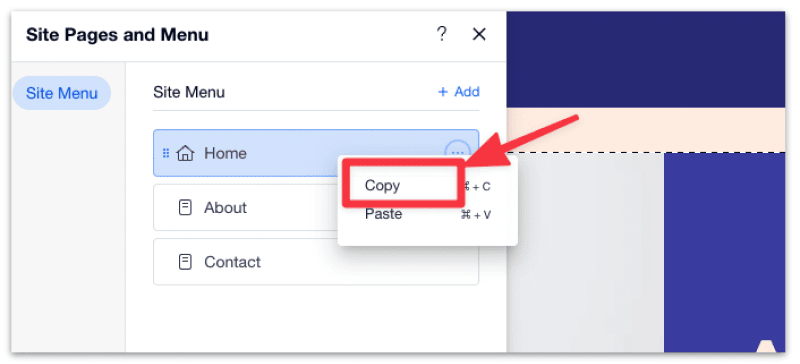
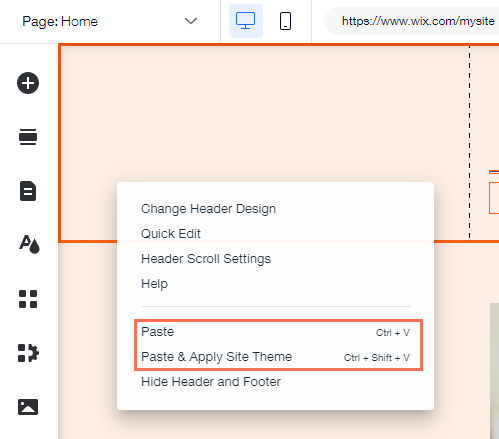
- Now, copy the page’s content by pressing the right-click on it and selecting “Copy.”
- Head back to the tab where your new Wix website is opened.
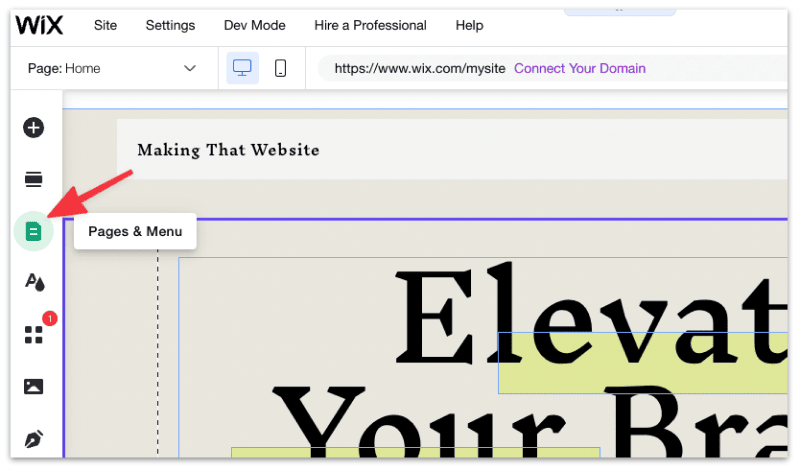
- Click on the “Pages & Menu” tab from the sidebar.
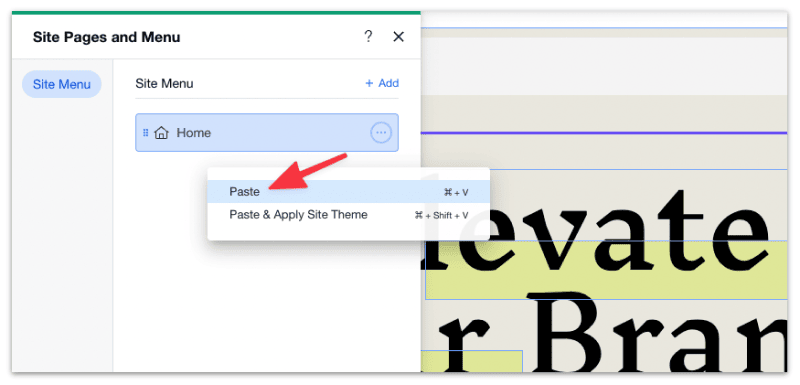
- Right-click and paste the content on this menu that you copied previously.
- Also, don’t forget to rename the page as per the relevant content you pasted.
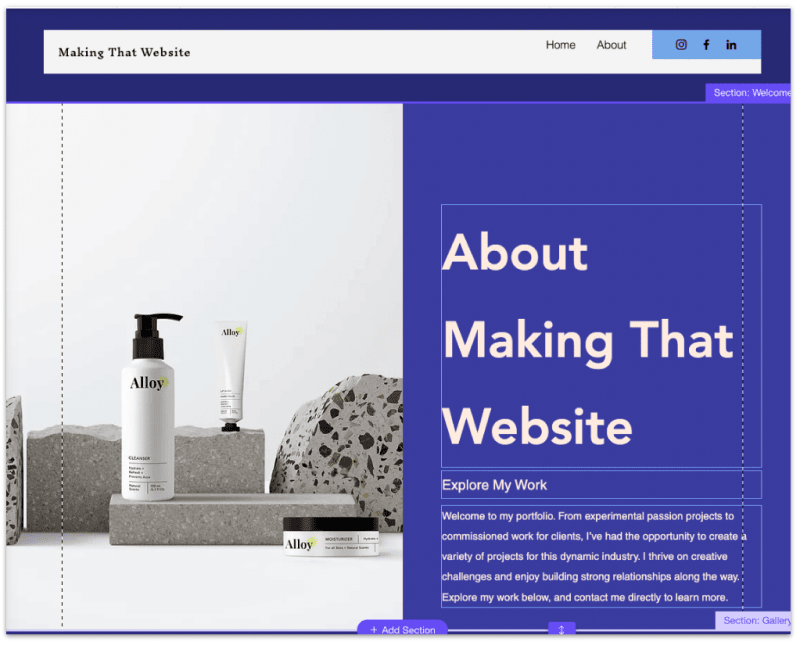
- Finally, you have the page working in your new Wix template.
You must repeat this step to copy and paste your old website content to the new Wix site. Undoubtedly, this process can be tedious; however, this is currently the only way in order to change your Wix site template.
Also, as mentioned, not all features can be transferred to your new Wix site, such as premium applications and widgets like contacts, videos, booking, etc. So, to get them on your site, you have to reintegrate or recreate these widgets/apps.
Step 3: Changing The Font Layout, Style, And Color Of Your Old Content To Suit The New Template
Once you finish copying and pasting your entire content on your new Wix site, you’ll find that most of the content will have the same design as your previous website.
You can’t do anything about it since this comes under the technical aspect of Wix. So, suppose you copy any existing content from a Wix site. In that case, you’ll copy its font style, images, background color, etc. But, some things like your header, footer, and navigation follow your new template design.
Hence, when you copy the content from your old site, you’ll need to change the font, layout, and color to match your new Wix site template. This will give you a complete feeling of migrating the content successfully to your new template.
Thanks to the Wix editor, changing these and other aspects of the site has become fairly simple. So, follow the below steps to match your old content with your Wix website’s new template design.
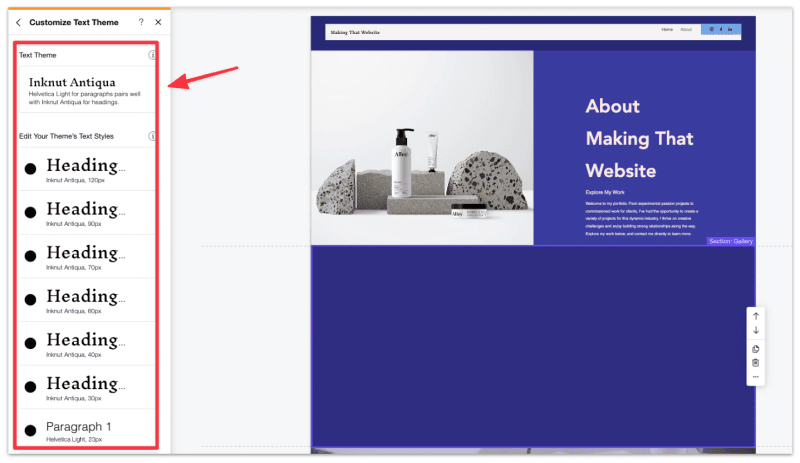
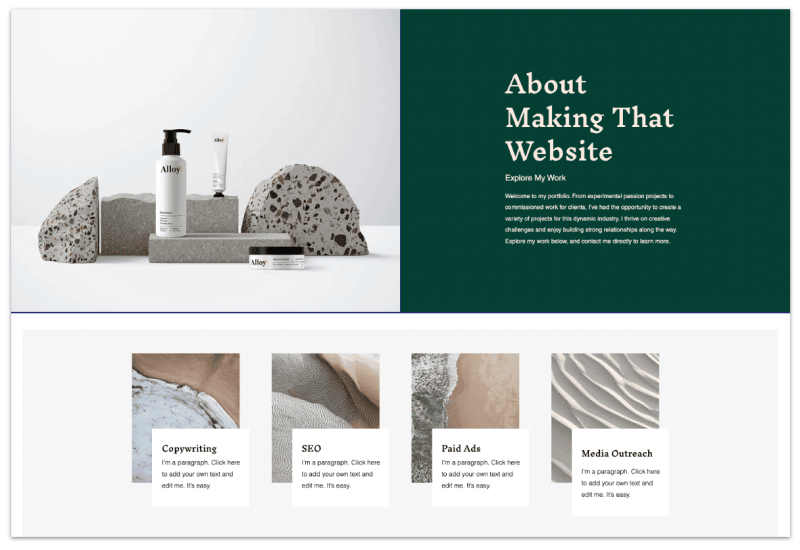
Change The Fonts To Match Your New Template
You’ll find changing the current font style fairly easy to match your new Wix template. The primary reason is that every Wix template has a default text theme. So, you’ll be presented with a selection of font styles for all the paragraphs and headings for the template.
For example, we’ll use the Inknut Antiqua font for mostly all the headings in the template. While for the paragraphs, we have the Helvetica Light font.
- Start by right-clicking on the header of your old content and clicking “Edit Text.”
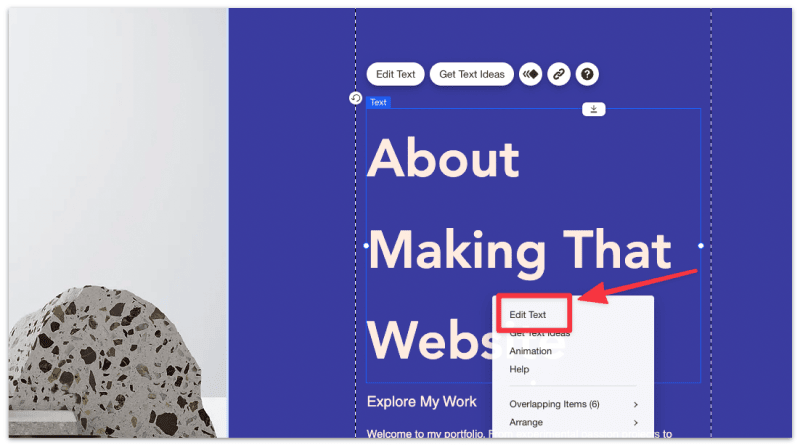
- Next, pick any of the theme headings.
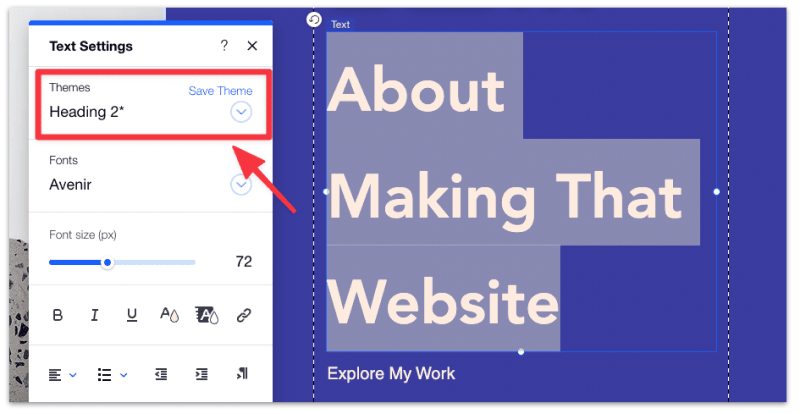
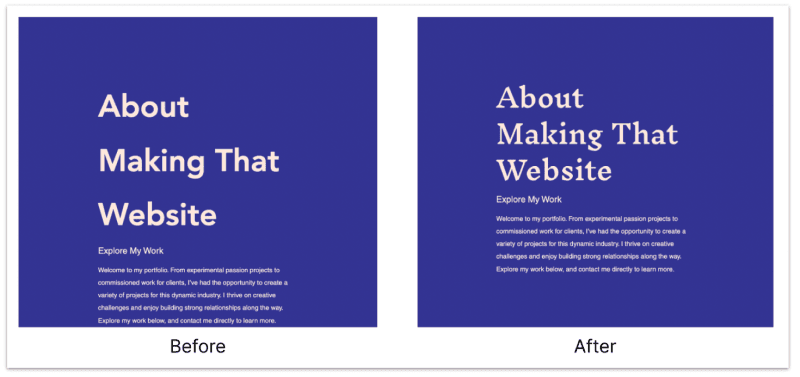
- Go with a theme that well defines your content and looks easy on the eyes.
- Here’s a sneak peek of how your content can look like before and after.
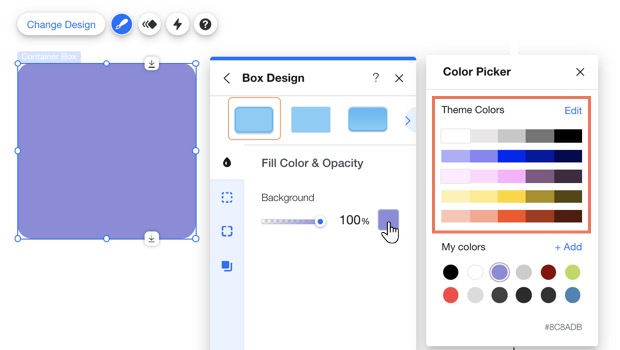
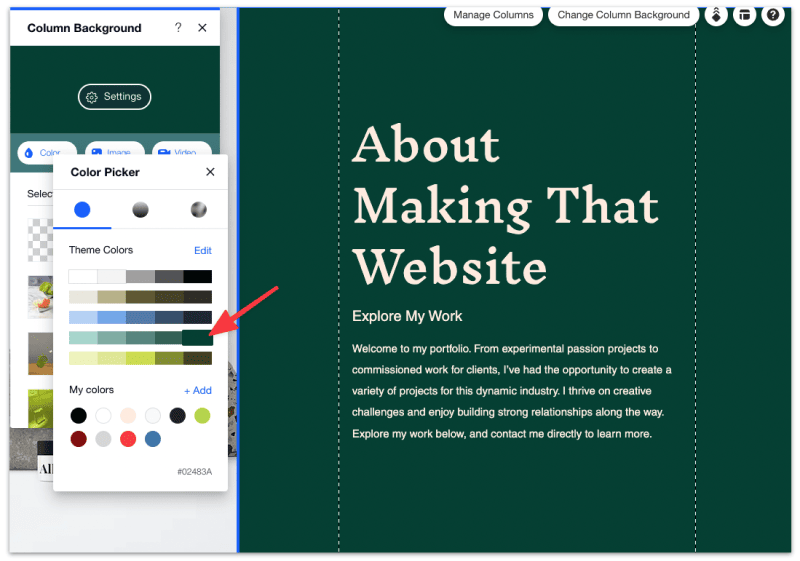
Change The Background Colors To Match Your New Template
Just like in the case of font themes, Wix templates also offer a color theme by default. So, changing the background color of your old content is not difficult.
- Firstly, head to the “Site Design” tab on the left.
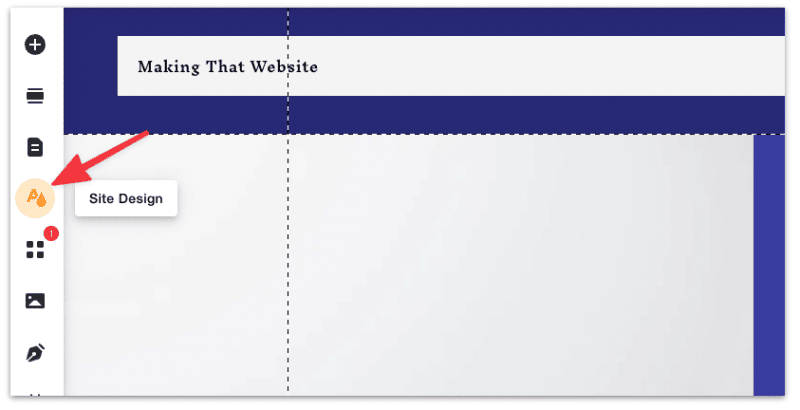
- Then, select “Site Theme.”
- Next, click on “Color.”
- Now, to change the color of your background, pick any background and click on “Change Background.” Then, select “Color.”
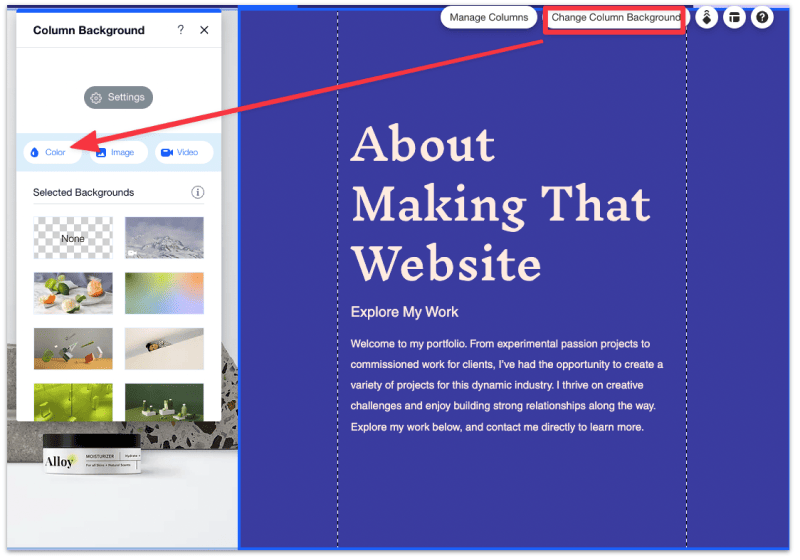
- Pick one of your preferred theme colors to apply to your background.
Change The Layouts To Match Your New Template
You can quickly add a new layout that will match your current website theme if you copy an existing layout from the present theme.
- Start adding a new page by clicking the “+ Add” icon from the website menu.
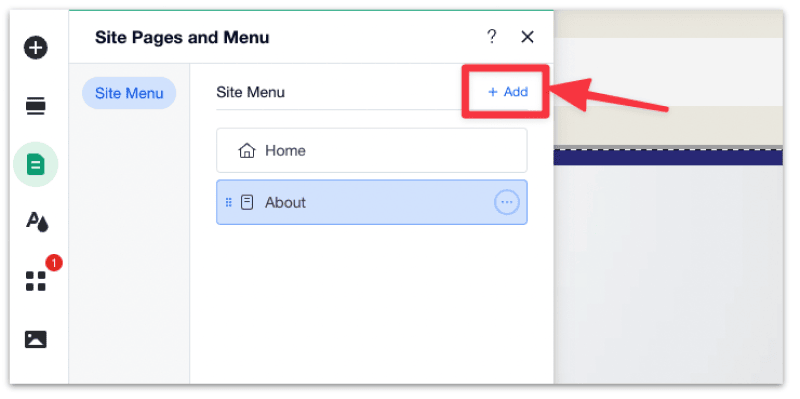
- After you add a new page from the menu, Wix will automatically apply the default font styles and theme color to all your layouts. So, you can easily add, edit, and change your current website to the new theme.
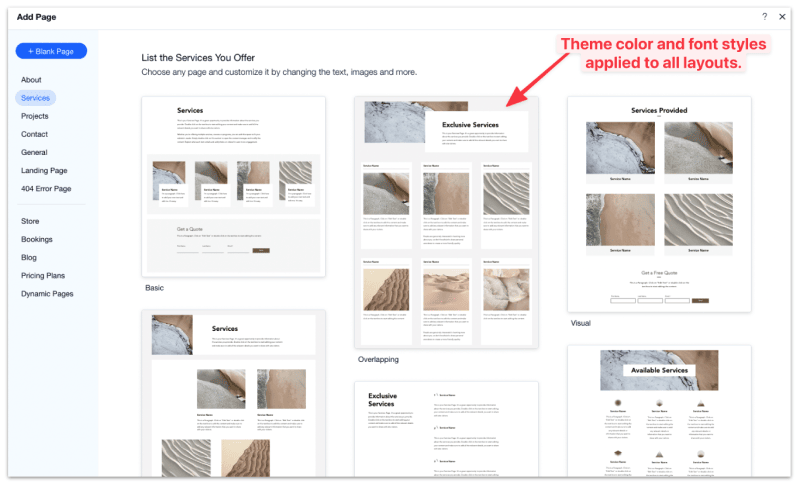
- Next, pick any of the page layouts from the category pages, and you can also copy a section from the present theme.
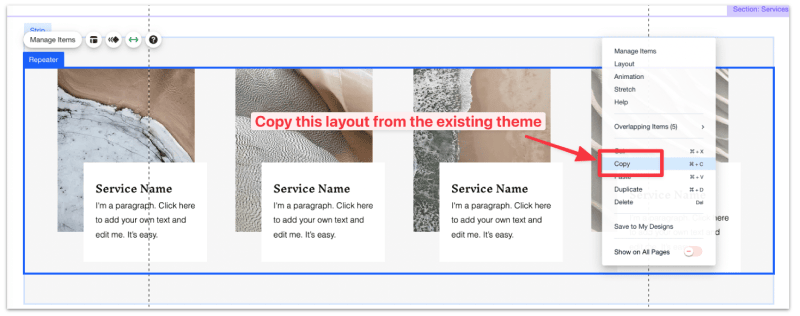
- After that, move back to the old content page. Right-click and paste the new layout.
Don’t Forget To Preview Your Website Before Publishing
Now, once you’re finished customizing your new Wix site template and making necessary changes in your content, it’s time to preview your website. Don’t rush to publish your site without getting a good look at it. Confirm whether the new Wix template is up-to-the expectations and as per your preference compared to your old website template.
To check this, tap the “Preview” button right at the top of the website editor. Make sure you get the perspective from both your desktop and mobile. This is necessary to ensure all your website design elements look right and the content is present correctly.
Once you finish previewing and are satisfied with the changes, you can publish your website to make it live for your audience. Simply tap the “Publish” button, and your website will be visible to the audience with the new template.
How To Customize Your Website’s Theme And Design Using Wix Editor?
Customizing your site’s design and theme is pretty straightforward when using Wix Editor. Using two panels in this editor gives you the power to change your website’s aesthetic, look, and feel.
Using the Site Design panel, you can select your text and color theme, as well as change your page transitions and background. Furthermore, to add themed elements, you can use the Add panel to give your website a thorough look.
Here’s what you need to perform:
- Select A Website Theme
- Add Themed Elements
- Choose A Page Background
- Setting Page Transitions
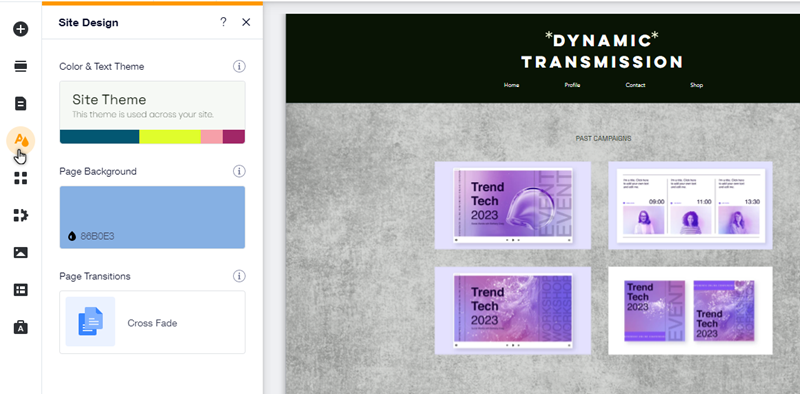
Select A Website Theme
When we talk about your site theme, it includes all the text styles and colors on the website. You can review multiple options and preview your site’s looks with each choice.
Once you decide on the theme, you may customize the colors and text to further personalize it to your requirements.
Follow these steps to select and customize a website theme:
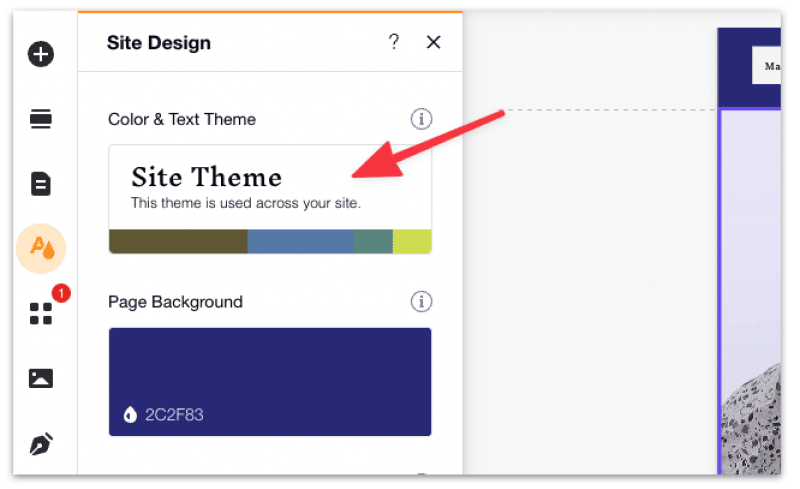
- From the Editor’s left side, select “Site Design.”
- Head to the “Color & Text Theme” section and tap “Customize.”
- Next, choose a theme from the list.
- Finally, customize the theme’s colors and fonts as per your preference.
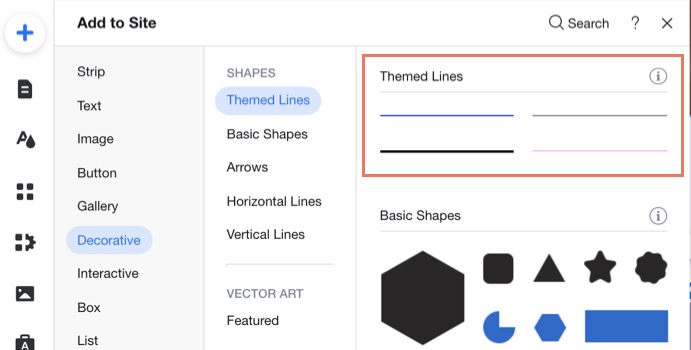
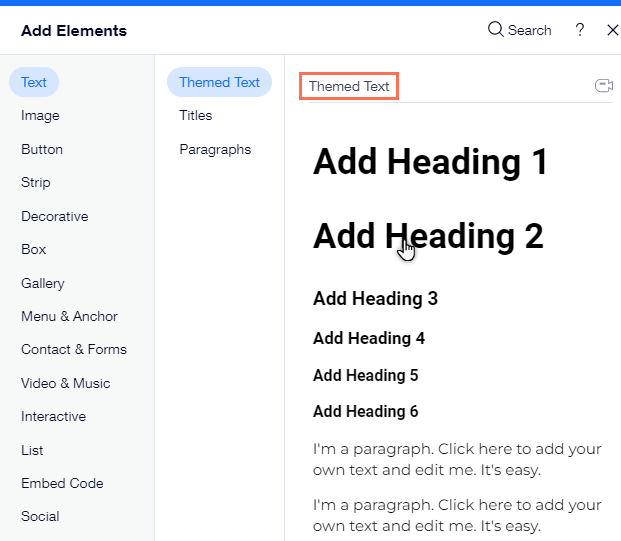
Add Themed Elements
You must add themed elements to ensure your design is consistent throughout the website. These elements will match your chosen text styles and color.
Since they are tied into the website’s theme, themed elements will automatically be updated if you select a fresh theme from the “Site Design” panel.
Follow these steps to add themed elements to your website:
- Firstly, select “Add Elements” from the Editor’s left side.
- Then, press the tab below the “Add Elements” section.
- After that, select the themed section, such as “Themed Text.”
- Tap an element to drag or add it to the appropriate location.
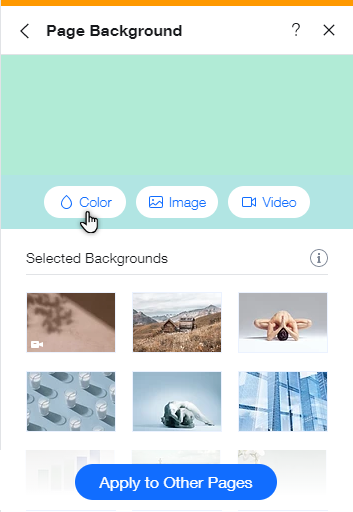
Choose A Page Background
You can change your page’s background by using the Site Design panel. Select between a video, color, or image background and customize it to match your design requirements.
Follow these steps to select your page background:
- Firstly, tap “Site Design” from the Editor’s left side.
- Then, head to the “Page Background” section and hit “Customize.”
- Now, pick the type of background you like for your page:
- Color background: You can choose from the website colors or add a new one to the page background.
- Image background: You can upload your own or select one from the free or priced image available in a wide variety to add to the page background.
- Video background: Pick a video for your page from top-quality stock footage, or upload your own video.
FAQs
How Do I Change The Template On An Existing Wix Site?
You can’t change the template on an existing Wix website because Wix doesn’t offer such a feature to their users. However, there is another way to do this, including:
- Creating a new website with a fresh template
- Copying the existing website content and pasting it onto the new site
- Changing the font layout, style, and color of your old content to suit the new template
How To Transfer Premium Plans In Wix?
Head to your account’s premium subscription to transfer plans in Wix. Select “More Action” and tap “Assign to a Different Site.” Hit the checkbox and then select “Next.” Finally, press “Assign.”
How To Change The Template On Wix?
To change the template of your Wix website, head to the “Settings” tab and tap the “Change Template” button. There you’ll get a list of all available template options.