WordPress is an open-source software that is also a widely used one, powering almost 43% of websites on the internet. On the other hand, GoDaddy is a popular hosting and domain provider. Many users rely on the platform for seamless domain and hosting services. While both of them provide complete solutions to their users, people usually use both platforms separately. GoDaddy is known for its domain and hosting services.
While on the other hand, WordPress is more versatile in creating and managing websites with its robust CMS (Content Management System). And that is why a good idea is to use them together for the most satisfactory services.
There is so much that you can do with collaboration, and that is why we bring you this guide. It will help you complete the process of setting up WordPress on GoDaddy.
Why Should You Install WordPress?
WordPress is more than just a blogging platform. It is quite a common misconception, so there’s no need to feel embarrassed, even if you used to think that way. Also, there are plenty of reasons as to why you should go for WordPress installation and not any other CMS. Let’s take a look at the benefits that WordPress entails.
More Freedom
The cost of using, installing, or downloading WordPress is none, and you can make changes that match your needs. And the phrase “more freedom” means you have plenty of options to explore. And since the platform is open source, you do not have to worry too much about bugs or errors.
Easy To Use Interface & High Degree Of Customization
Even though it is equipped with plenty of features, WordPress is very beginner-friendly and flexible. It has a simple interface with various menu options in the dashboard.
It makes it easy for users to create page posts, customize the design of their websites, monitor the comments, approve only the ones they want, etc. Even with minimal technical know-how, people can manage their own websites. It becomes even easier with the plugins, as the users get tools to improve the website’s functioning. On top of that, many plugins are free of cost and are still helpful.
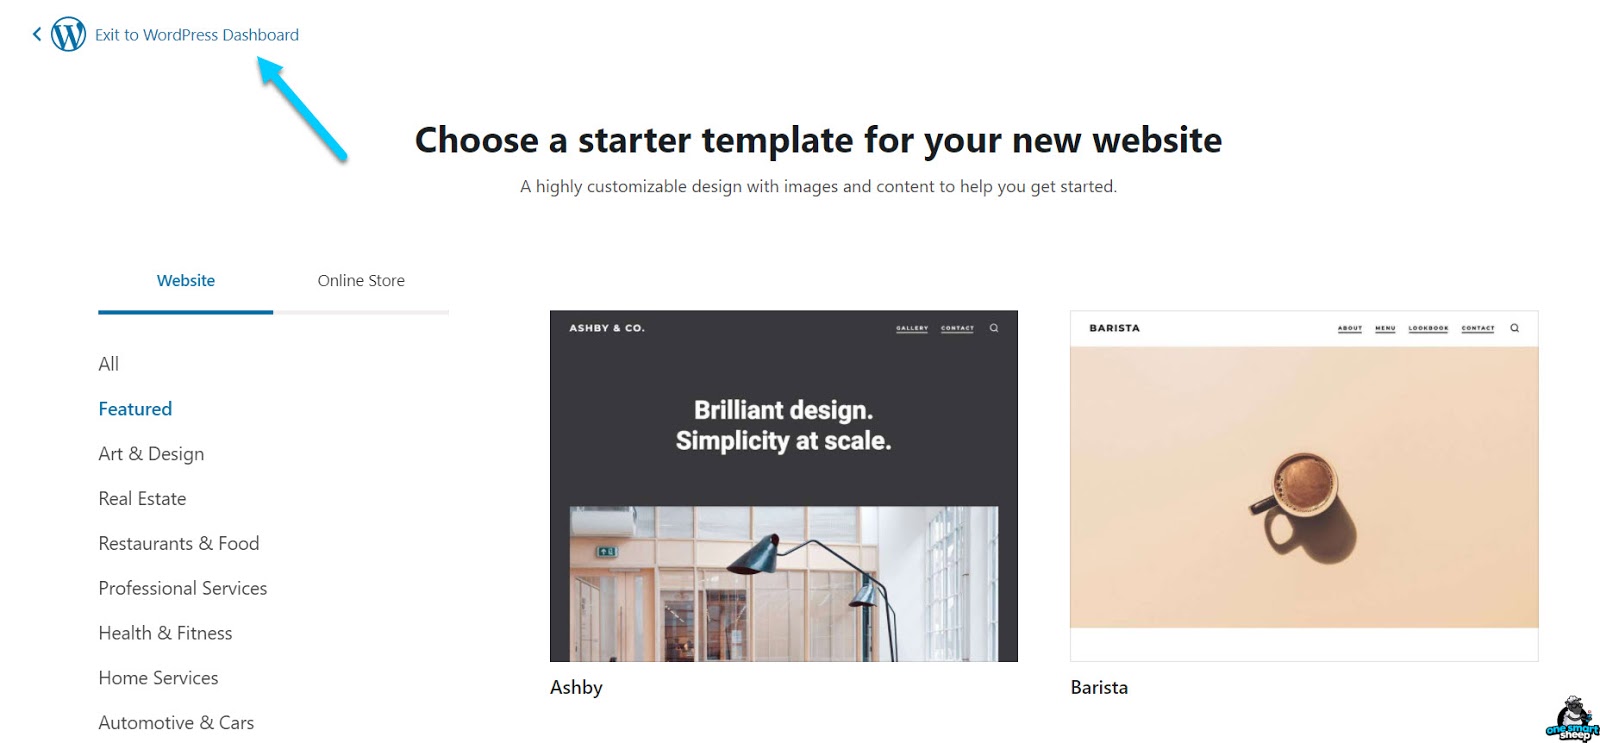
The platform also makes it very easy to create websites. And it is something that even amateurs can learn. There are plenty of website templates that are free to use. They make the designing process much easier as it does not involve any amount of coding. In fact, you can find many who make enough bucks by creating WP websites for others.

Some essential plugin types that are crucial to every website are as follows:
- SEO (Search Engine Optimization) plugin that keeps track of your website’s SEO. Nowadays, these plugins also help with easy website registration and offer insights on the things that can be optimized for better rankings.
- Analytics plugin to monitor and have better control over your website’s traffic. We recommend you use Google Site Kit, which is a free plugin. It provides you access to Google Search Console, Google Analytics, and many more.
- Contact form plugin to provide your website visitors with a way to contact you.
You can also install other plugins. However, it would depend on the type of website you are building. Anyways, now that you are aware of the user interface and customization, let us move on to the next point.
SEO Friendliness
Another one of the reasons people love using WordPress is its SEO friendliness. The platform is designed with top-quality code, keeping search engines in mind. It is also the reason why WordPress sites rank higher in search ranking on any search engine.
While the websites are SEO-friendly, it doesn’t take away the fact that you need to use SEO plugins.
Security Features
WordPress is also a platform that ensures the safety and security of your website. However, to ensure maximum security, you can follow the methods below:
- Install security plugins
- Keep your WordPress up to date
- Use strong passwords which are unique to your website
- Avoid giving admin access to your WordPress account
- Use a reliable hosting service
- Enable SSL for your website to use HTTPS for a more secure website
- Add two-factor authentication
What Is GoDaddy Hosting?
GoDaddy Hosting is a company that provides web hosting services. Some other services that they offer include domain registration, online marketing, as well as tools for easy website building. You can choose custom plans as well, which suit your business plan the most.
This hosting program is among the popular web hosting providers. It is also why many small businesses prefer using hosting plans from GoDaddy hosting. The plans they offer include:
- VPS hosting
- Shared Hosting
- Dedicated servers
- A free domain name
- Unlimited storage and bandwidth
One other thing is the different types of hosting services they provide, such as web hosting, business hosting, reseller hosting, WP hosting, etc. Whatever the type of hosting there is, the installation process of WordPress remains the same.
Two Ways To Install WordPress On GoDaddy
There are two ways by which you can install WP on GoDaddy, no matter the hosting you use.
#1: New Hosting Plan Purchase
This section will cover the method when a user purchases a new hosting plan from GoDaddy.
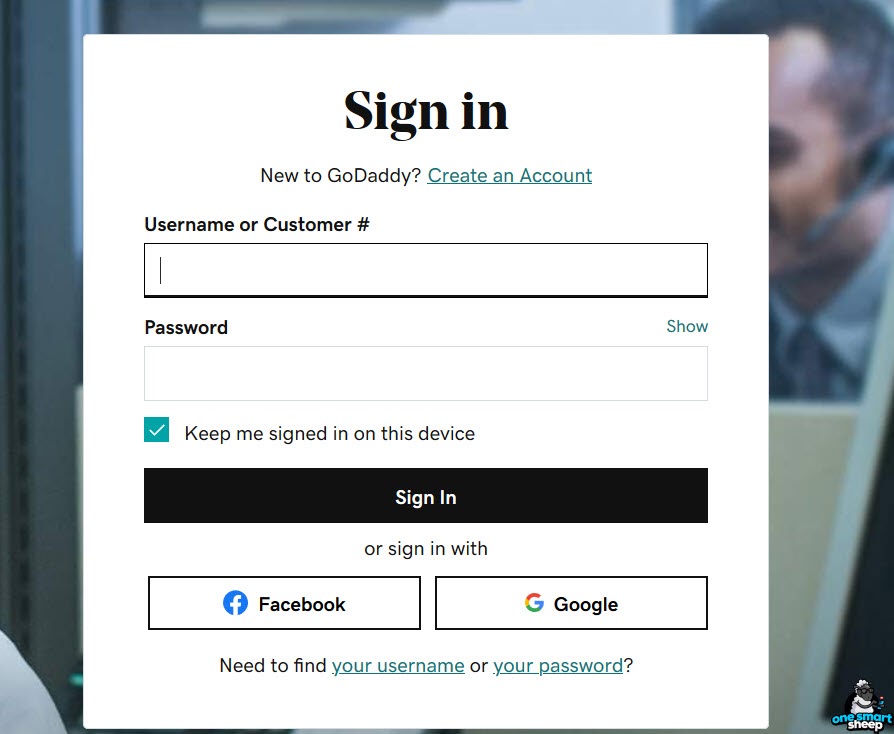
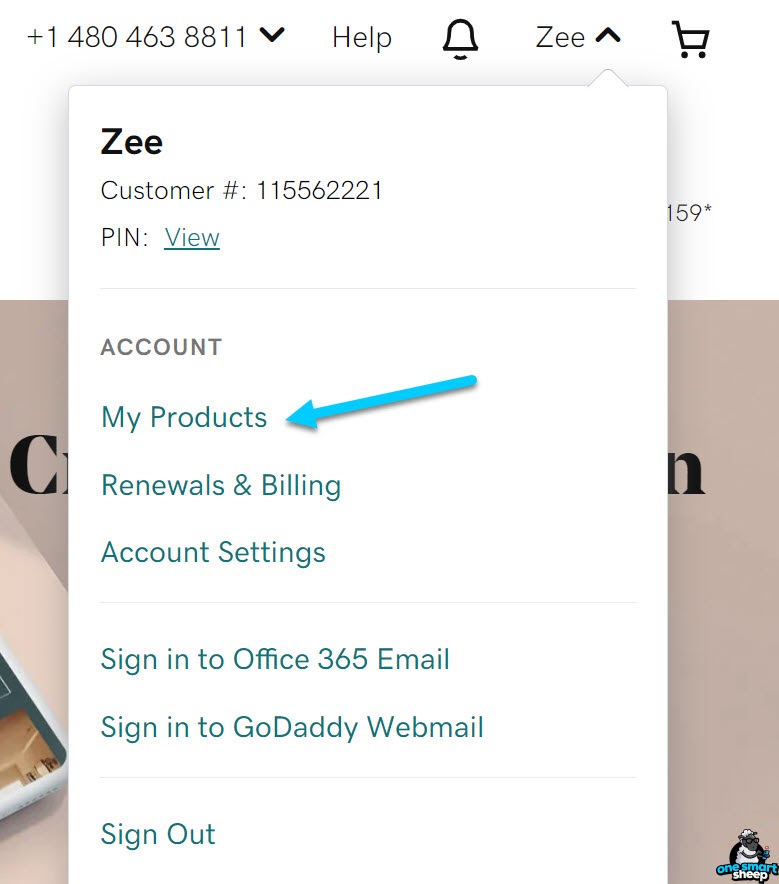
- First, you need to sign in to the GoDaddy account you have.
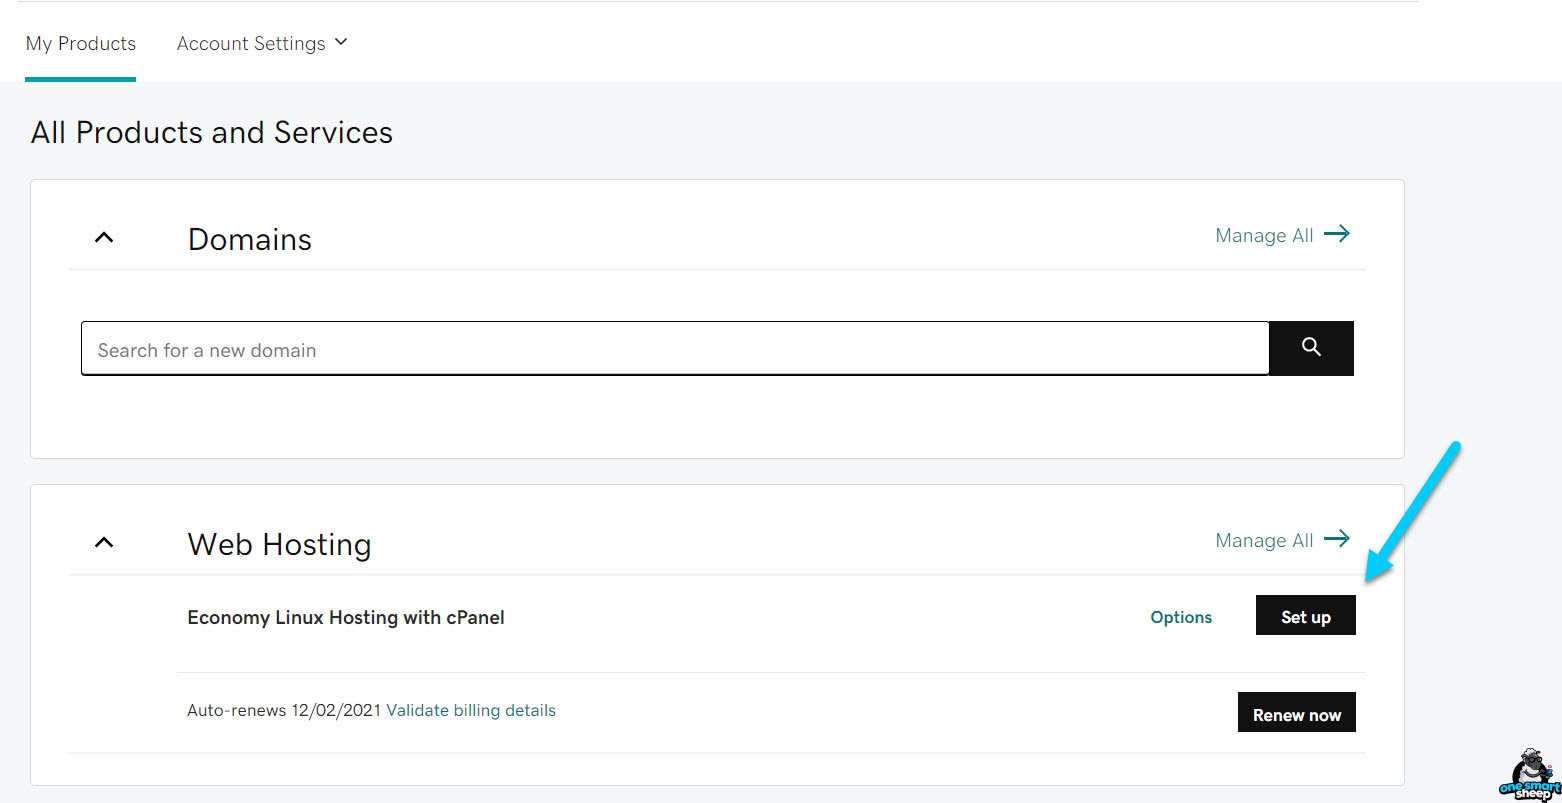
- Next, go to the top right corner of the dashboard and select your name. There will be a drop-down menu where you must select “My Products.” Then click the “Set Up” button under the web hosting menu.
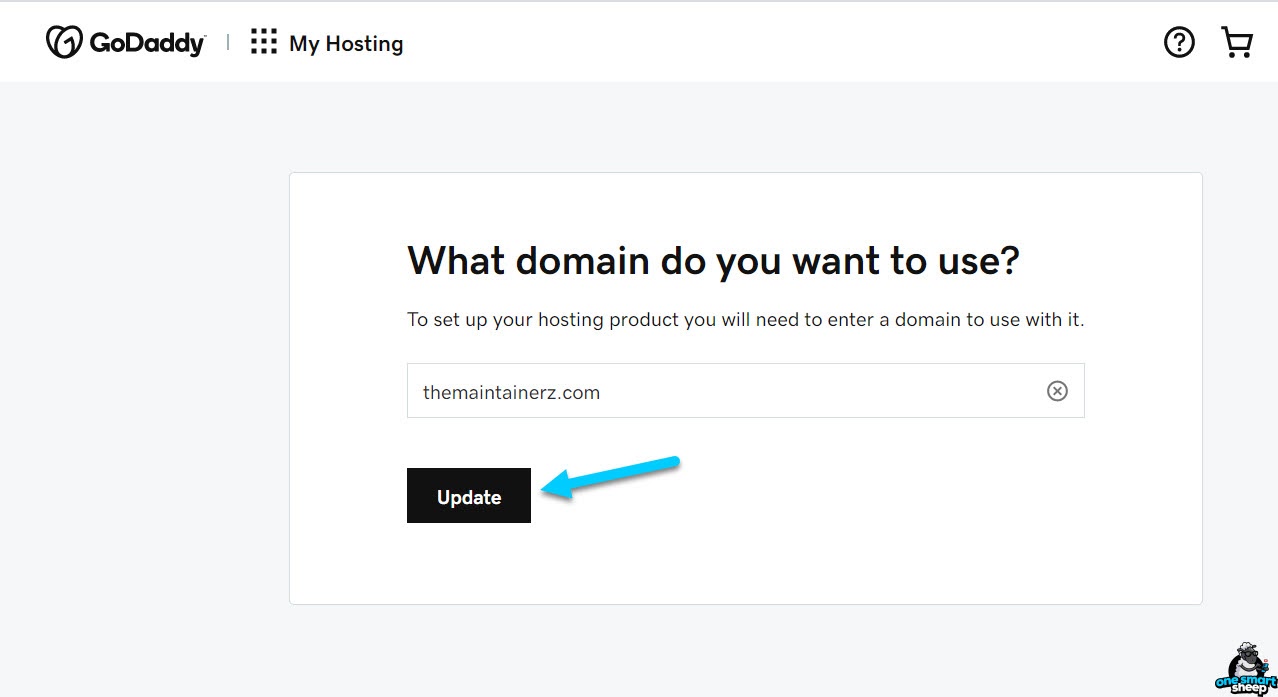
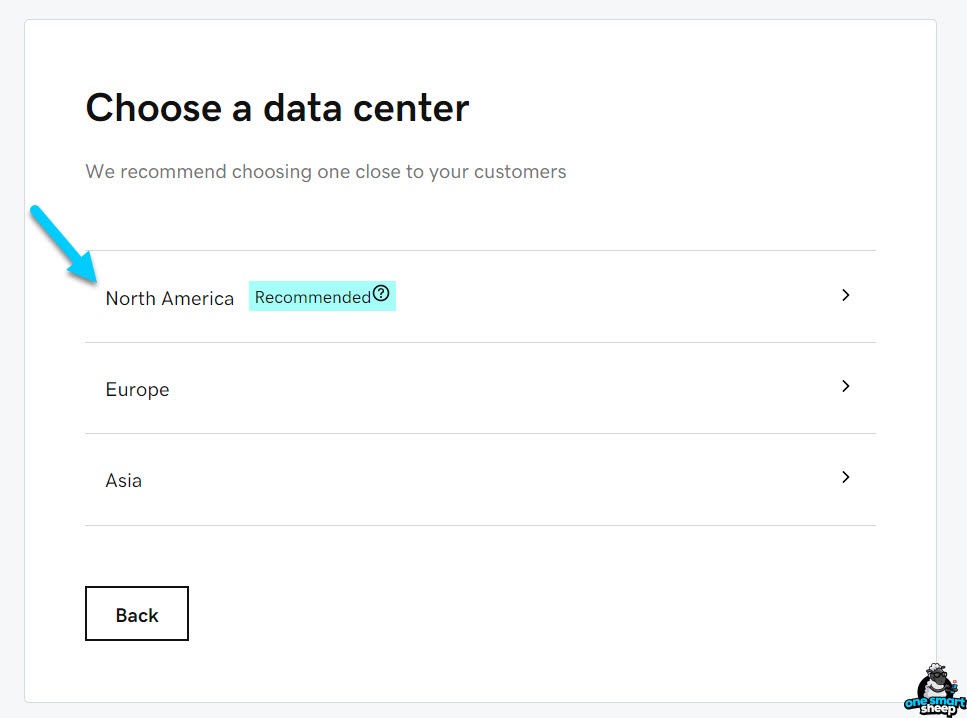
- Insert your domain name, click “Update,” and then choose the data center. Select the location where you want to set up your business.
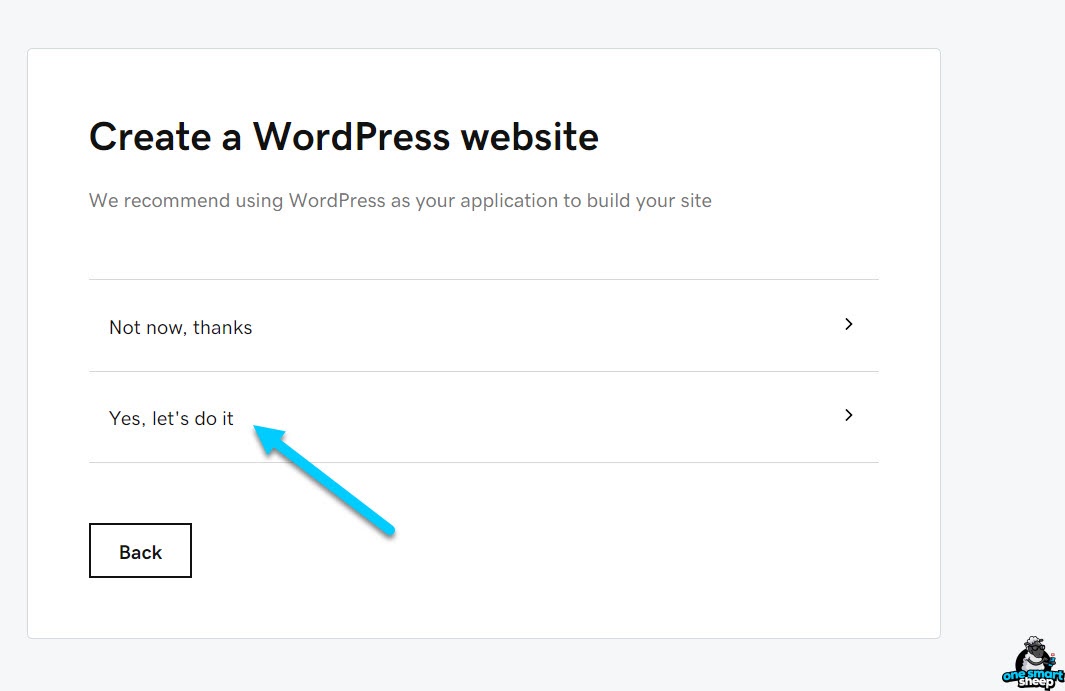
- After selecting the location, you will encounter a window with a “Create A WordPress Website” heading. Click “Yes, let’s do it” to start the installation.
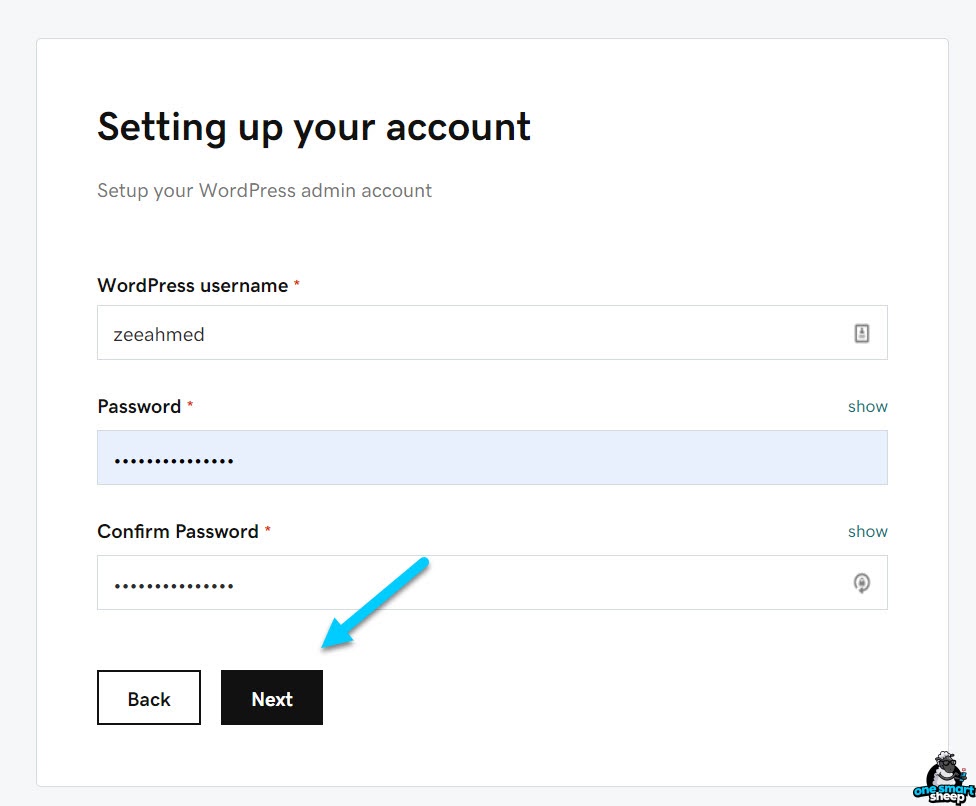
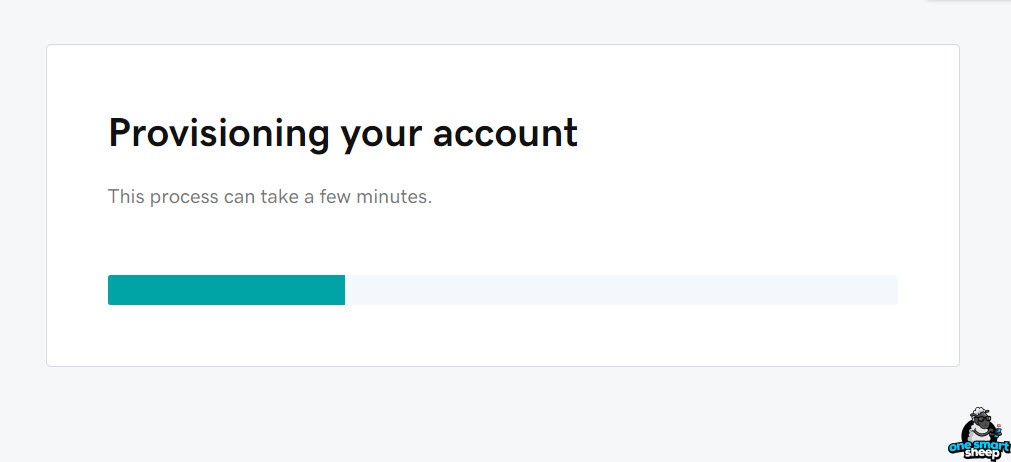
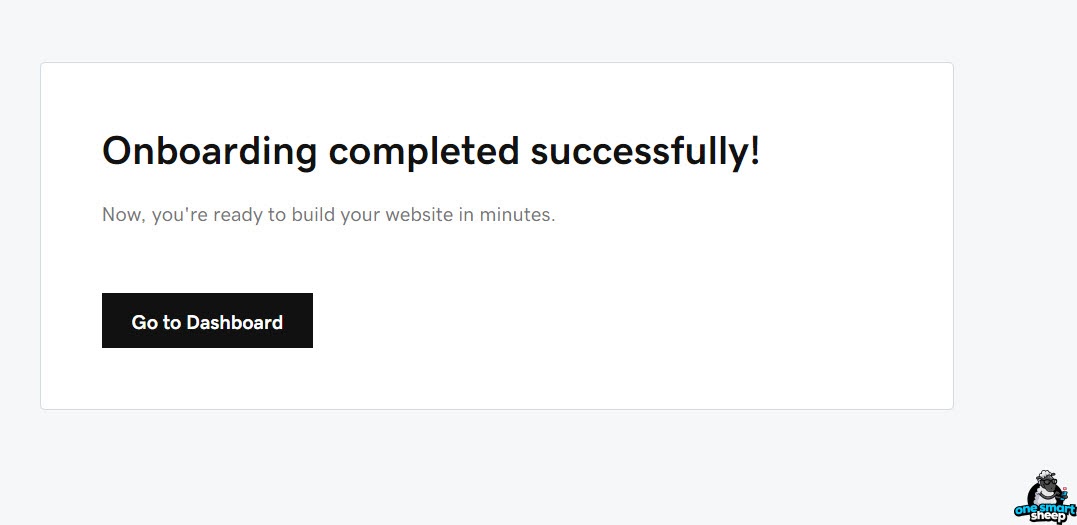
- Now, create your WP account by setting up a username and password for that account. Wait for the setup to complete.
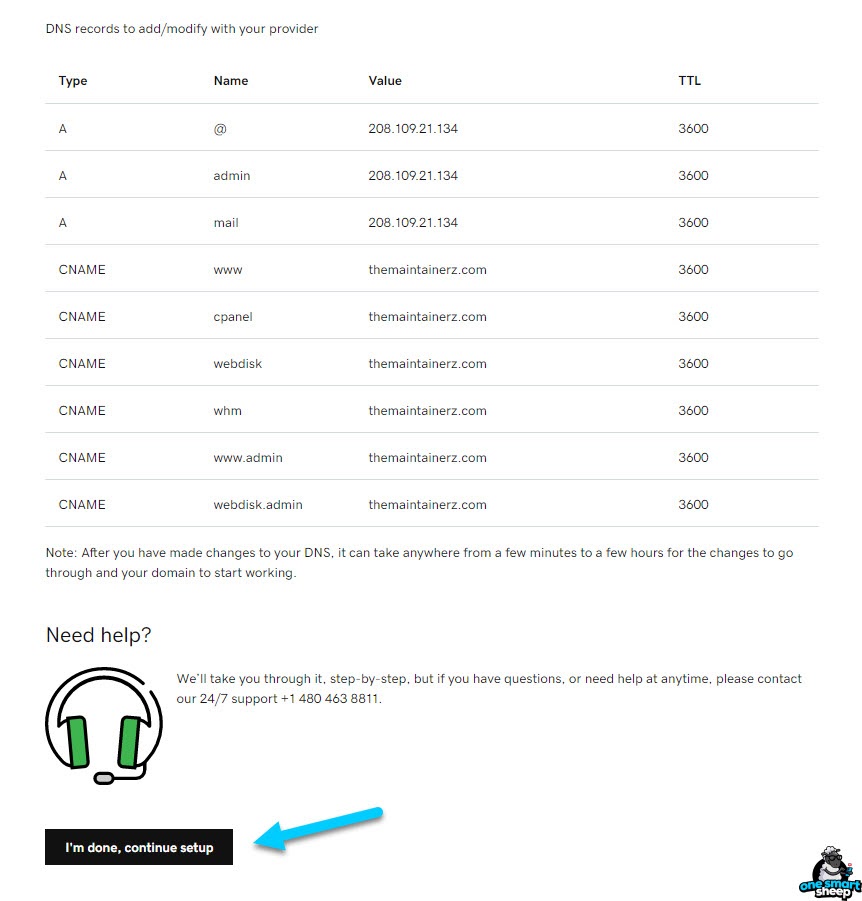
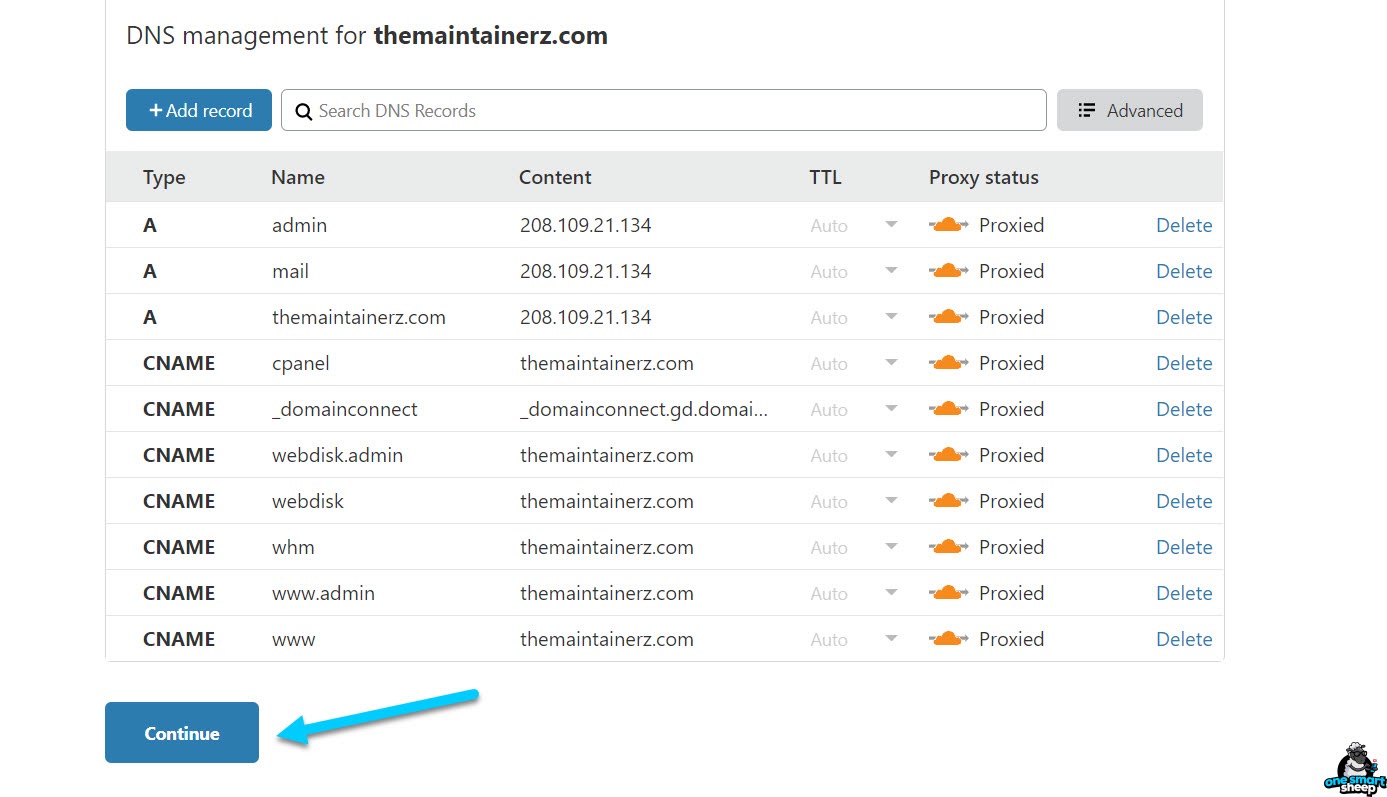
- Then your screen will display DNS records which will feel complex. However, you do not have to do anything there, just click on “I’m done, continue setup” and move on. Now, click on “Go to dashboard” on the next screen and keep reading as the process is still not complete.
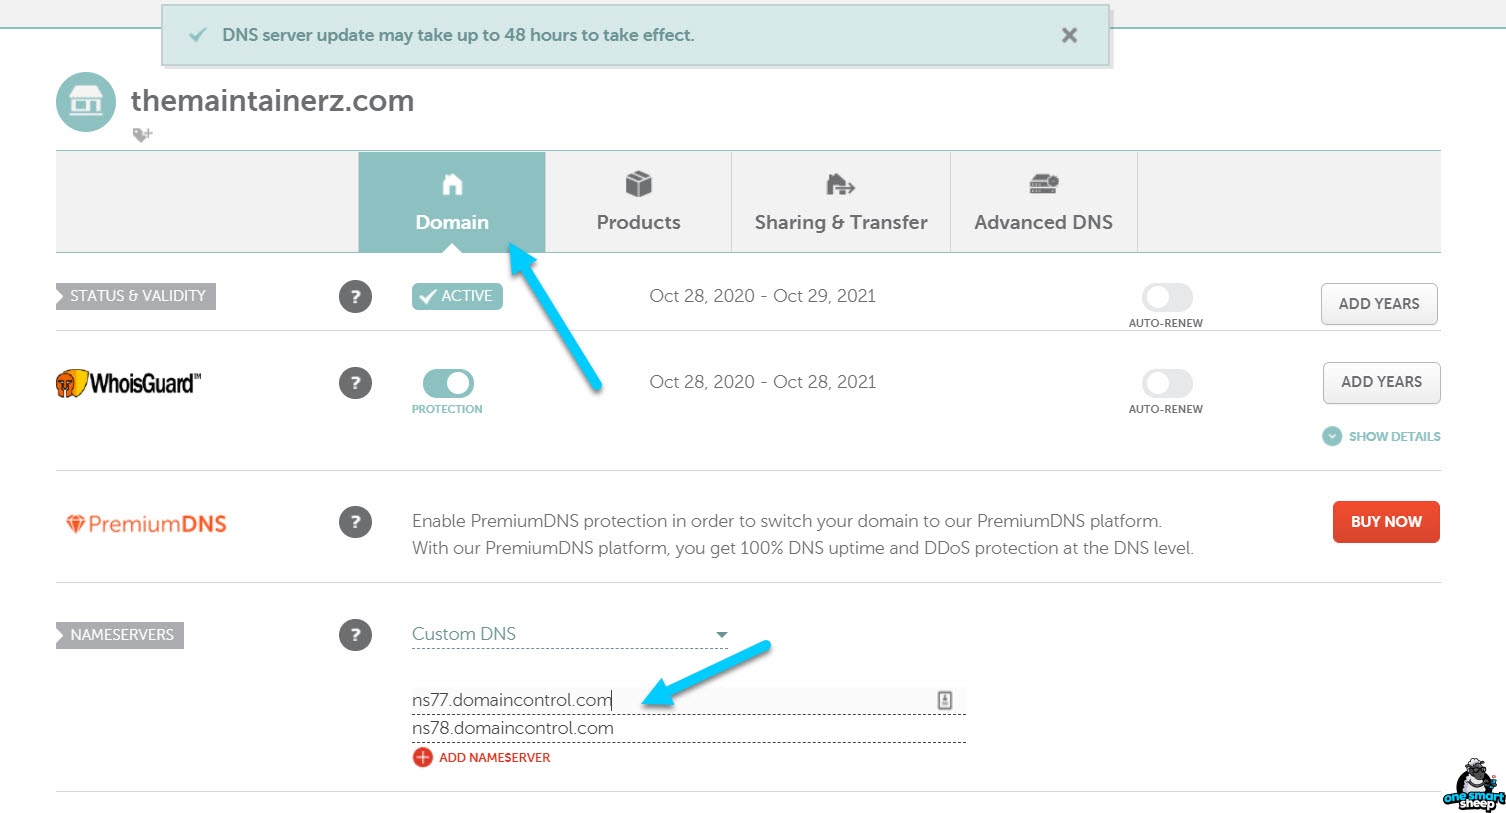
- You may encounter an error that happens often when the domain belongs to another registrar.
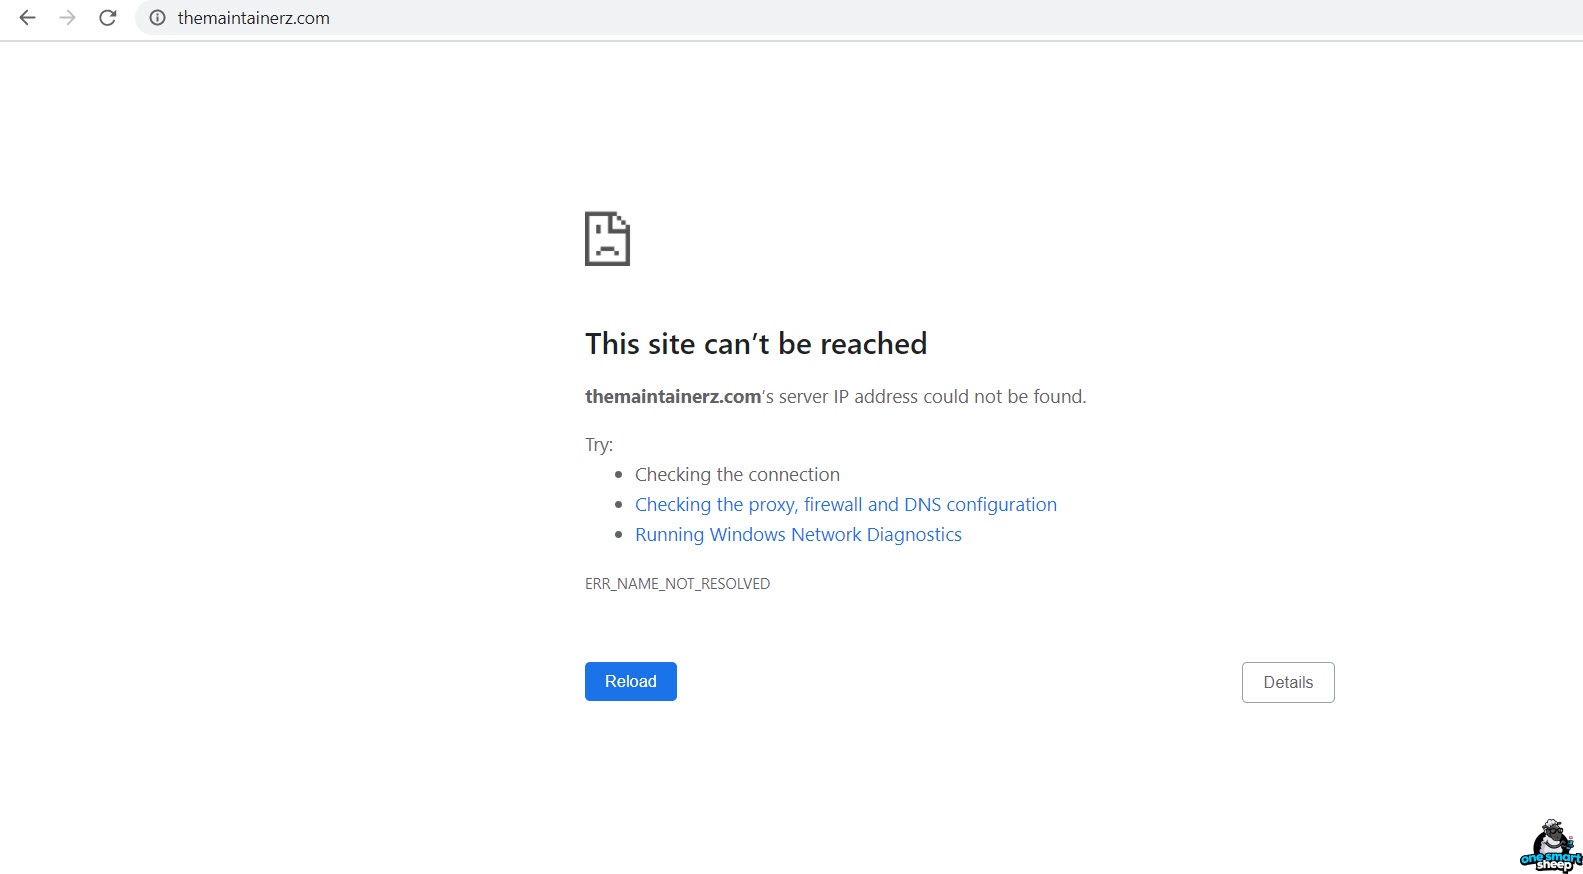
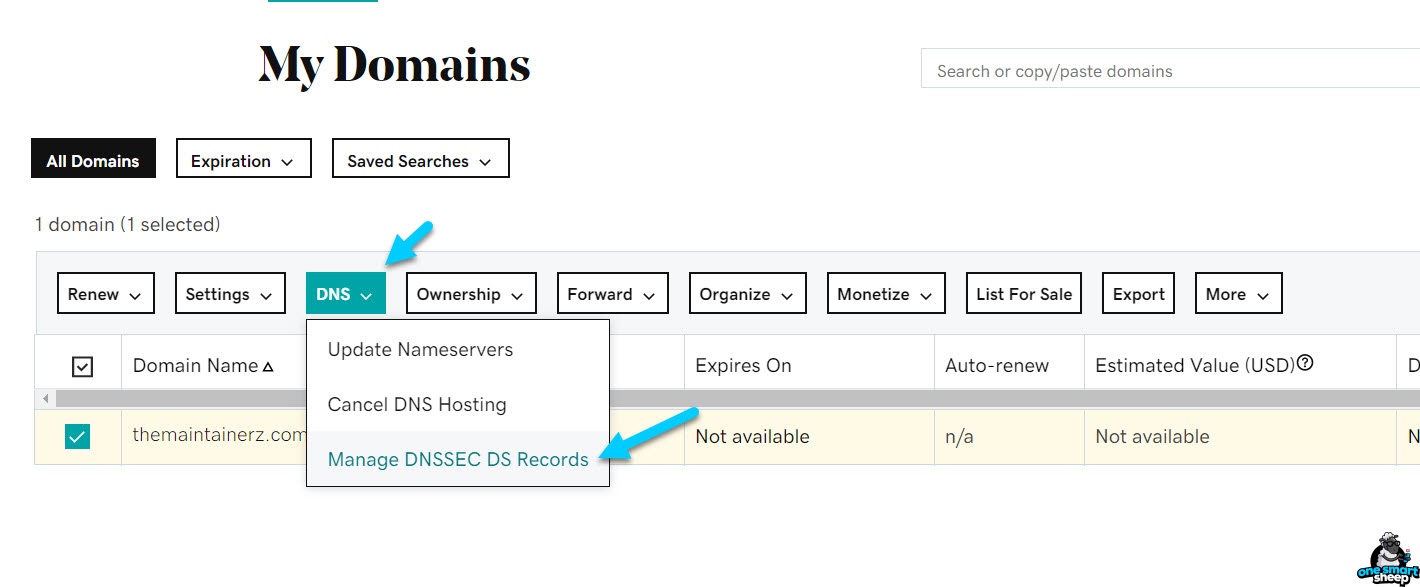
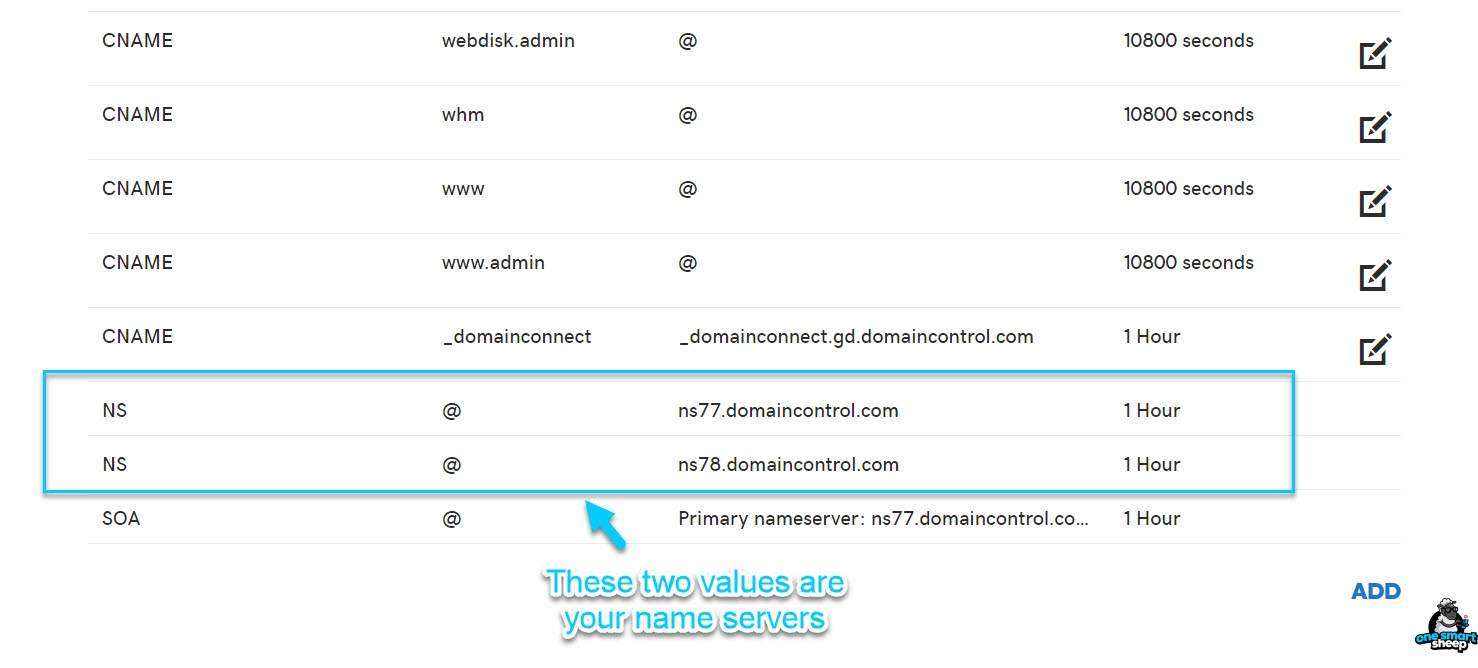
- To solve this error, you would have to insert the GoDaddy nameservers into the registrar of your domain. In order to find the name servers for the hosting provider, navigate to Domain Management > DNS > Manage DNSSEC DS Records.
- Now copy the NS records from GoDaddy and insert them into Namecheap’s DNS.
Also Read: How To Fulfill Orders On Shopify: Knowing The Complete Process
- DNS propagation can take a long time, so be patient during that process. Once it is complete, refresh your website, and now it will load properly.

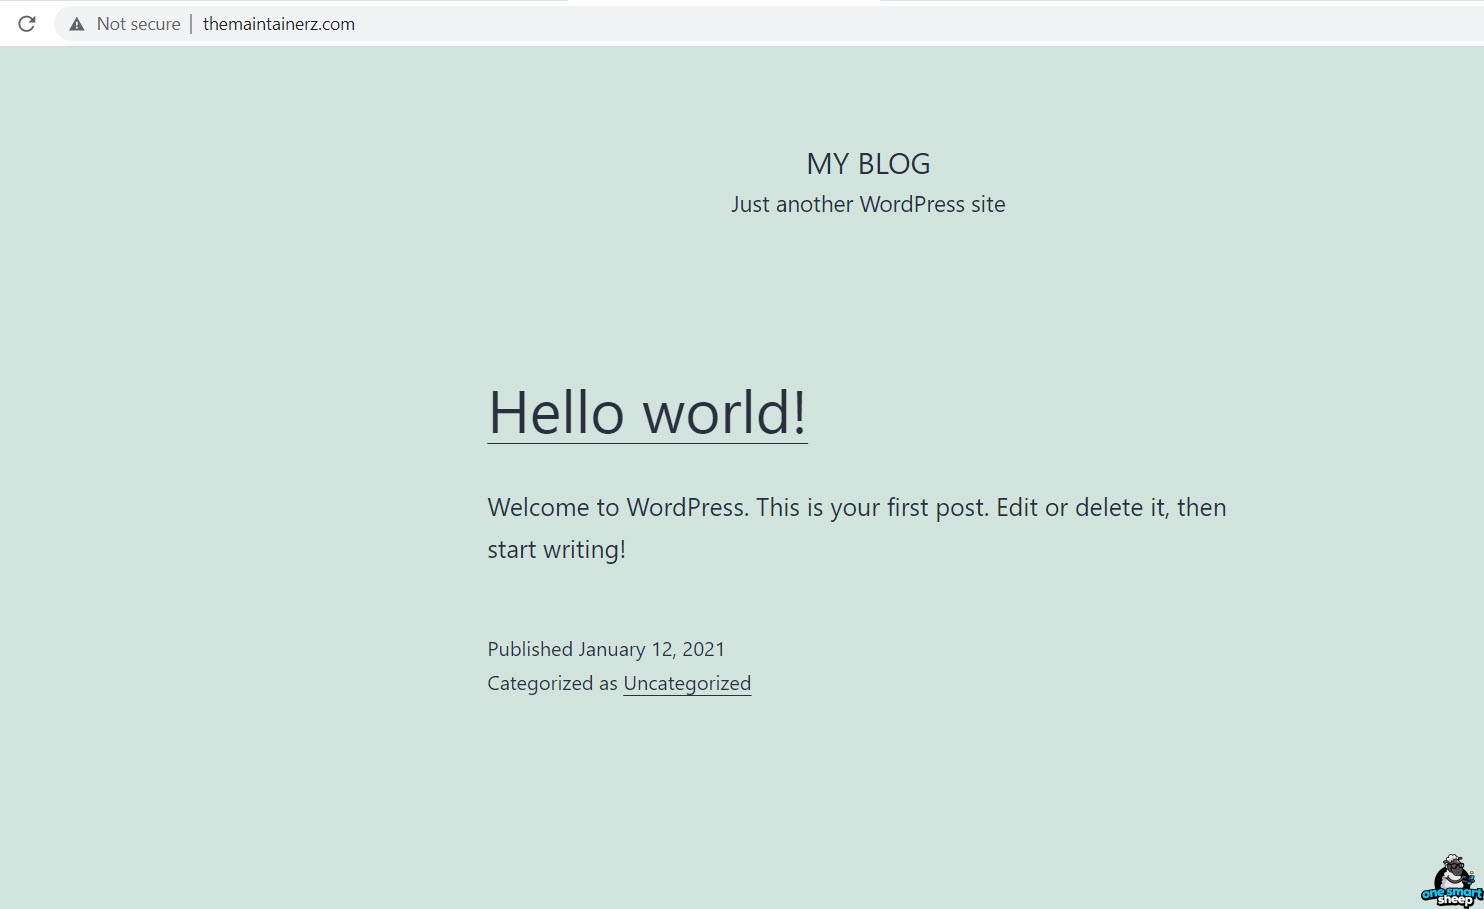
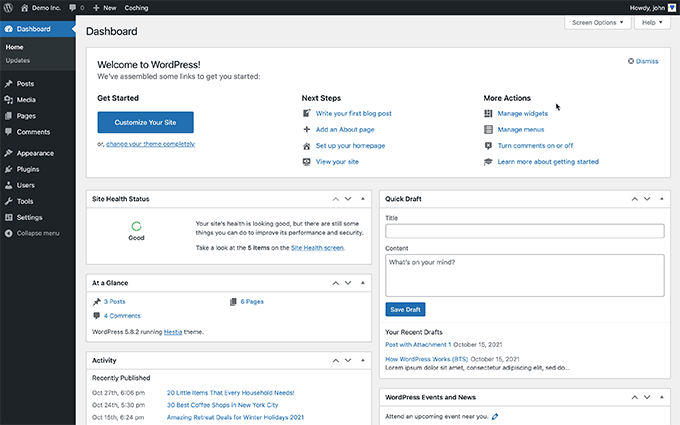
- Now, you can log in to WordPress and use the admin dashboard.
#2: Using cPanel
The second method of WP installation is done manually by using cPanel. If you are wondering what it is, then let us do the honor of telling you. cPanel is the web hosting’s panel, making it easier to manage the website hosting process.
The manual installation method is also suitable for users with a WP hosting plan. Let’s start with the process.
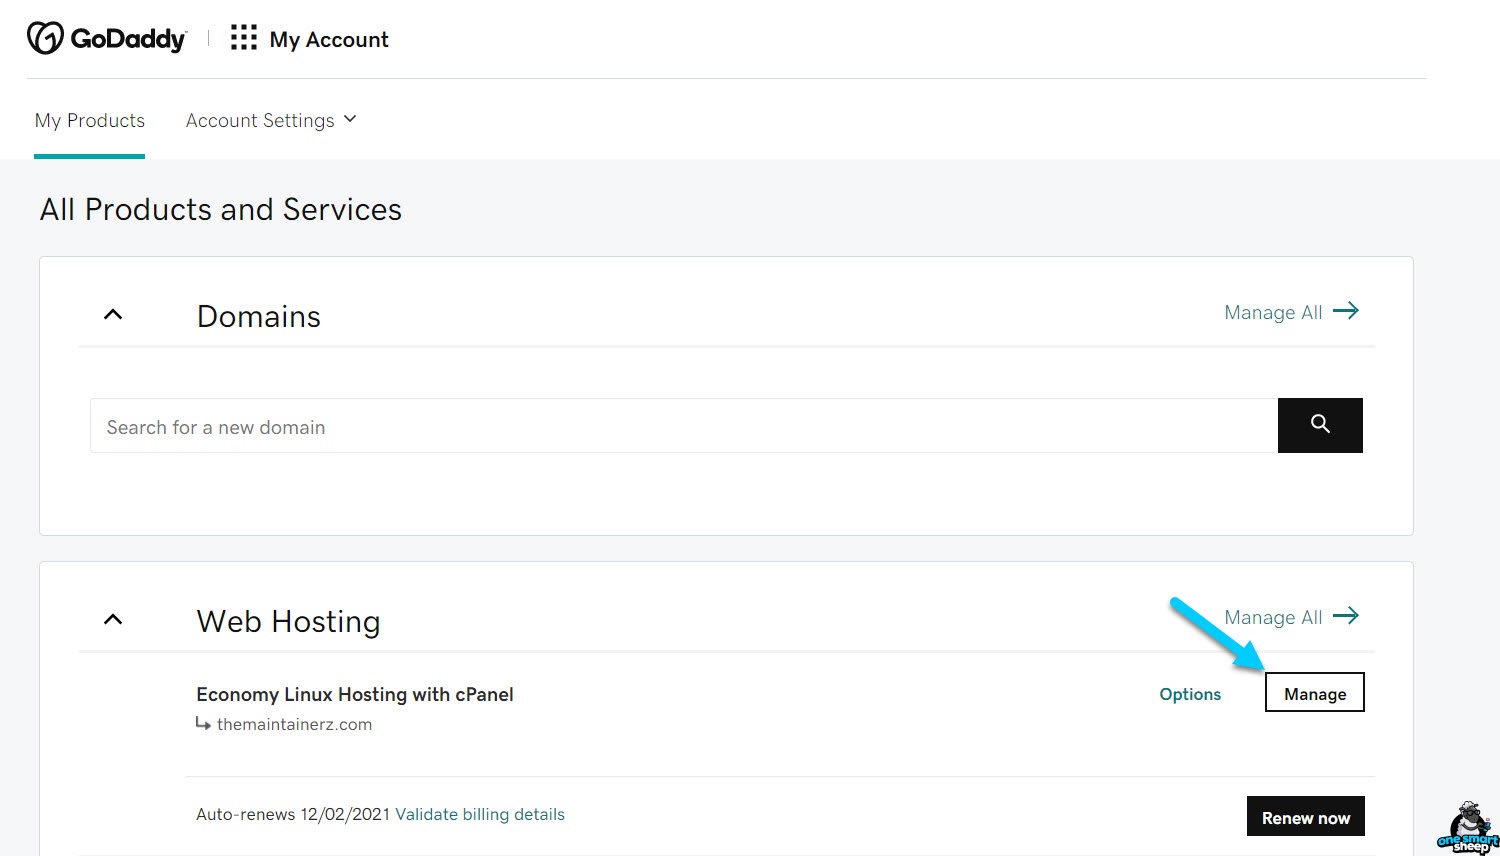
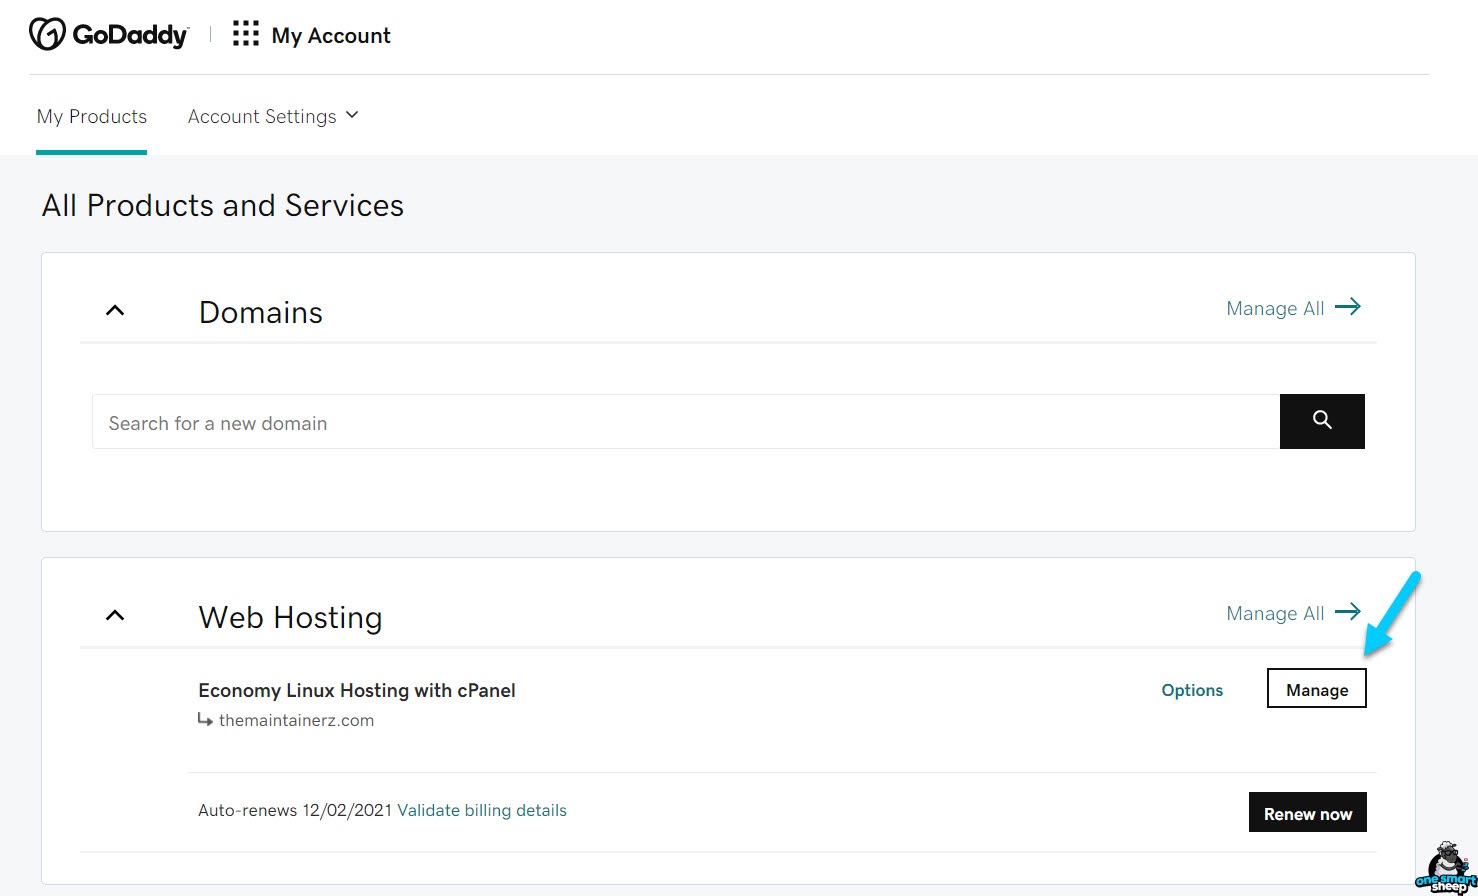
- Log in to your GoDaddy account, click “My Account,” and then “Manage.”
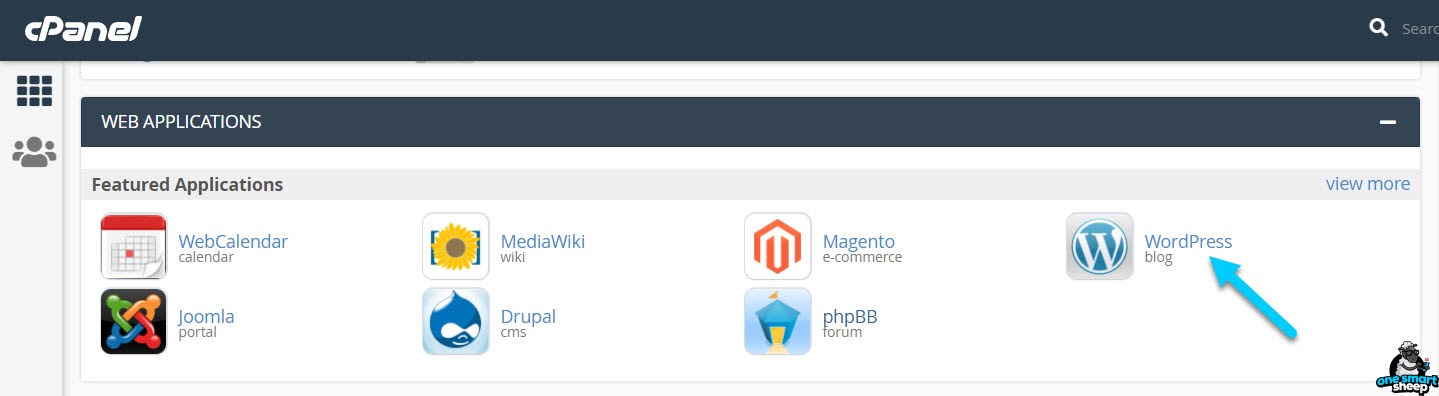
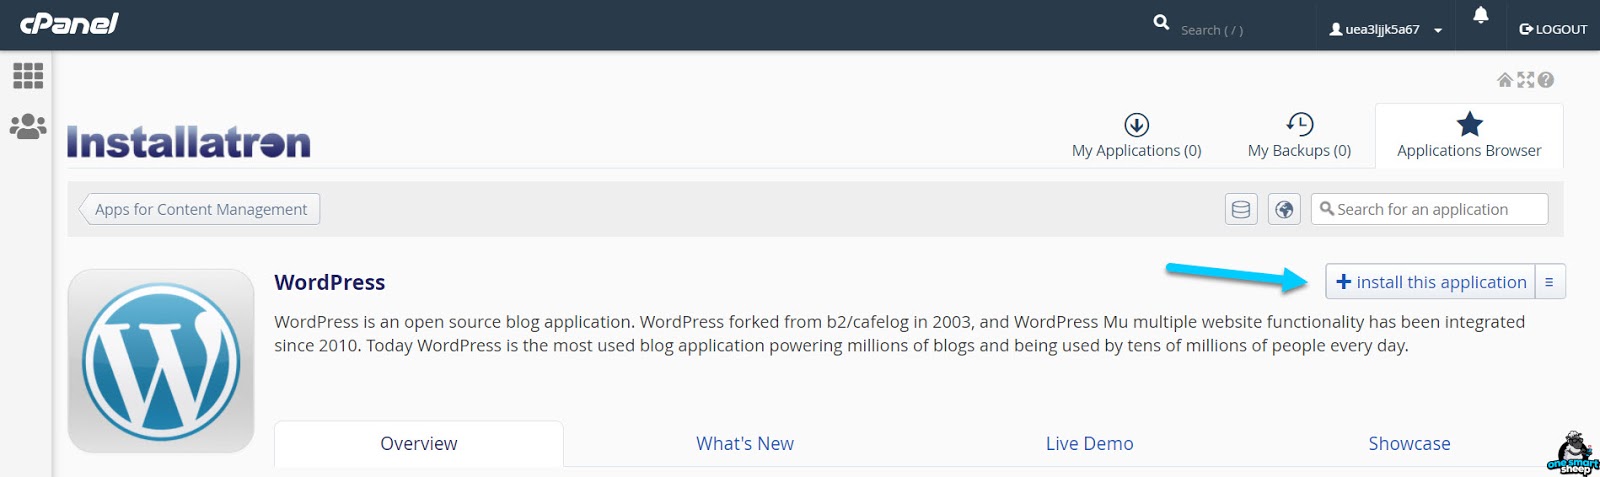
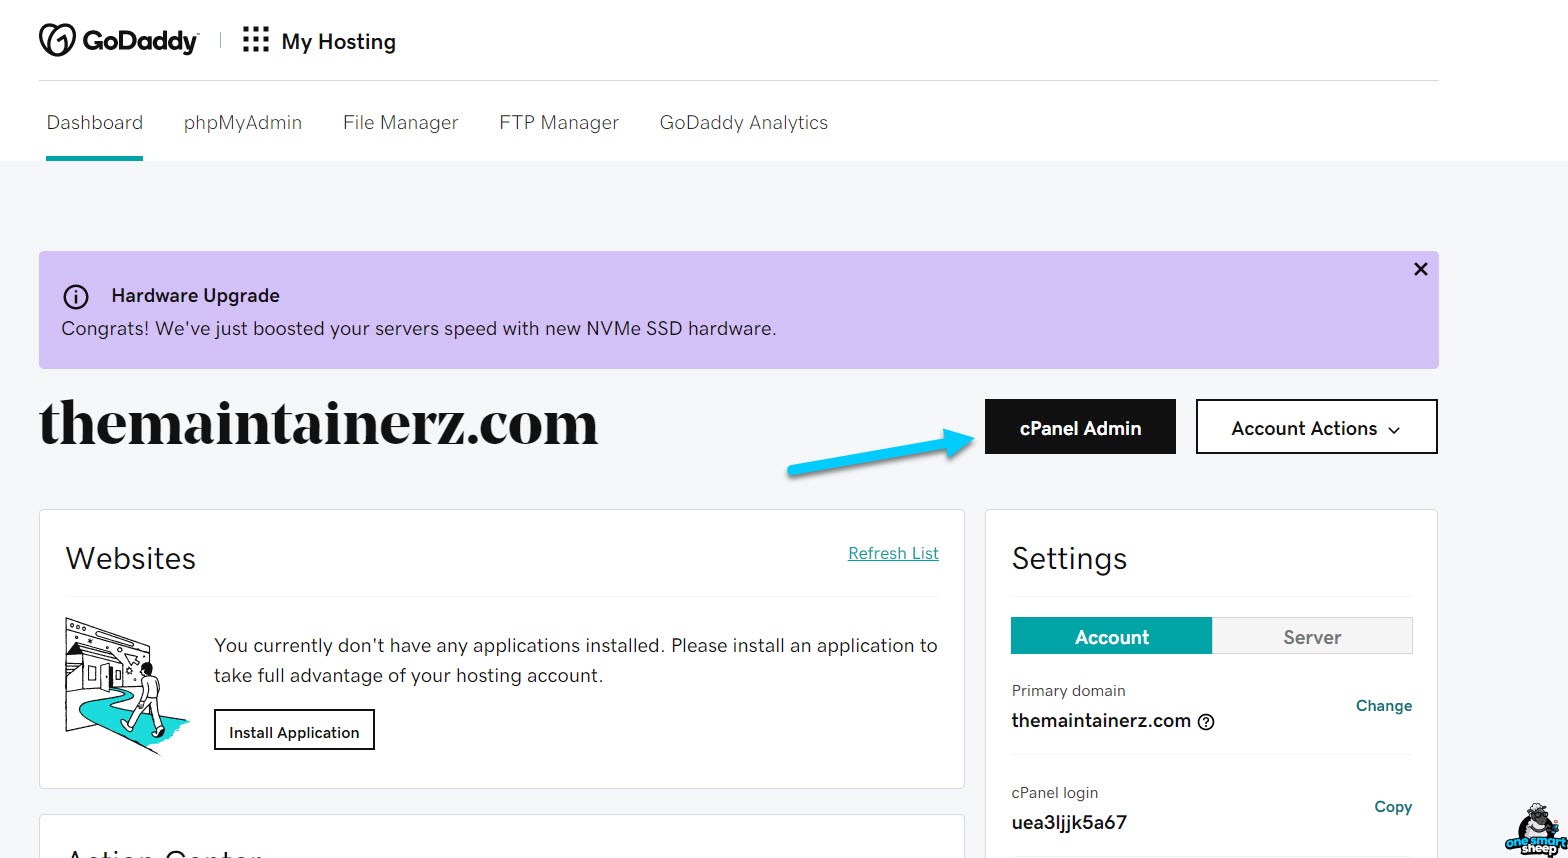
- Next, you need to click on the “cPanel Admin” button. Look for WordPress in the “Web Applications” section of the menu.

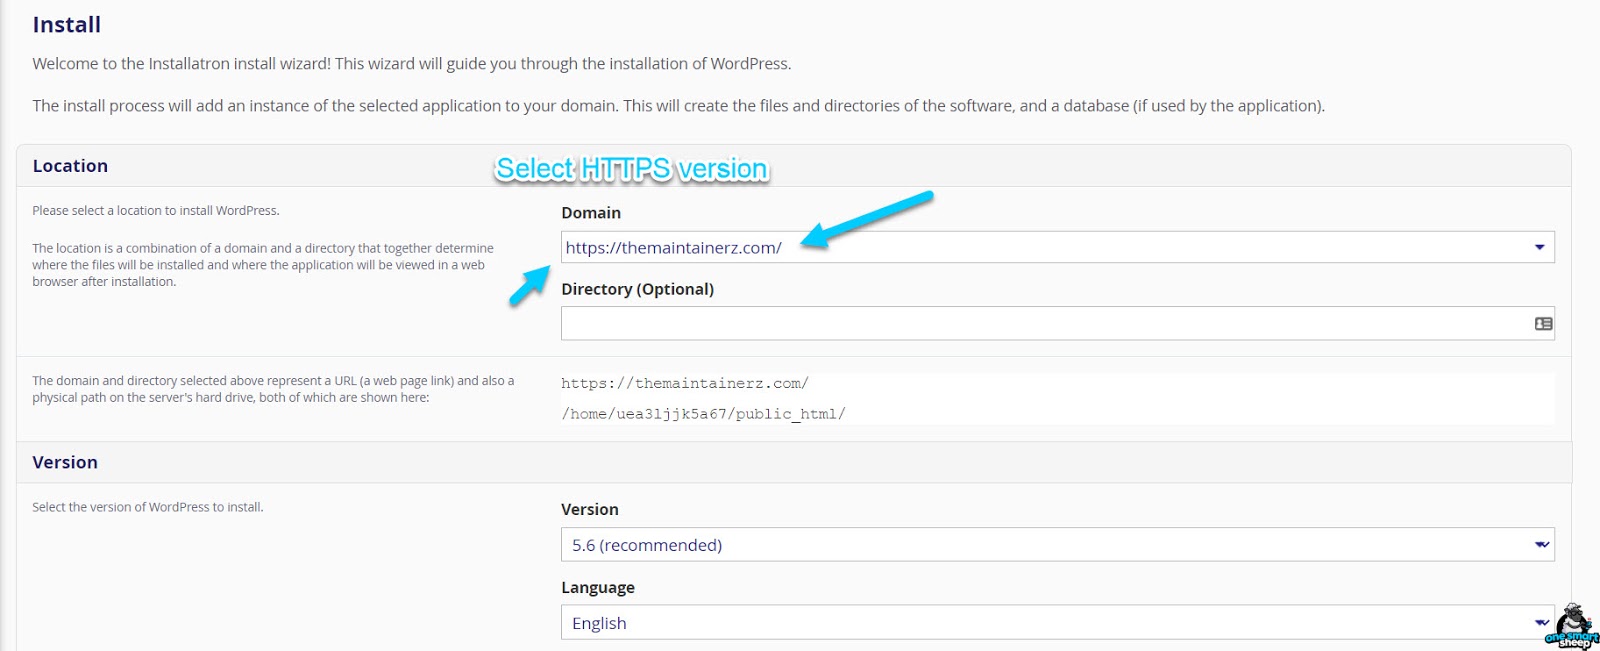
- Click the “Install this application” button and select your website’s HTTPS version. (If you do not have an SSL certificate for your website, there is nothing to worry about. The coming section will cover the installation of SSL.)
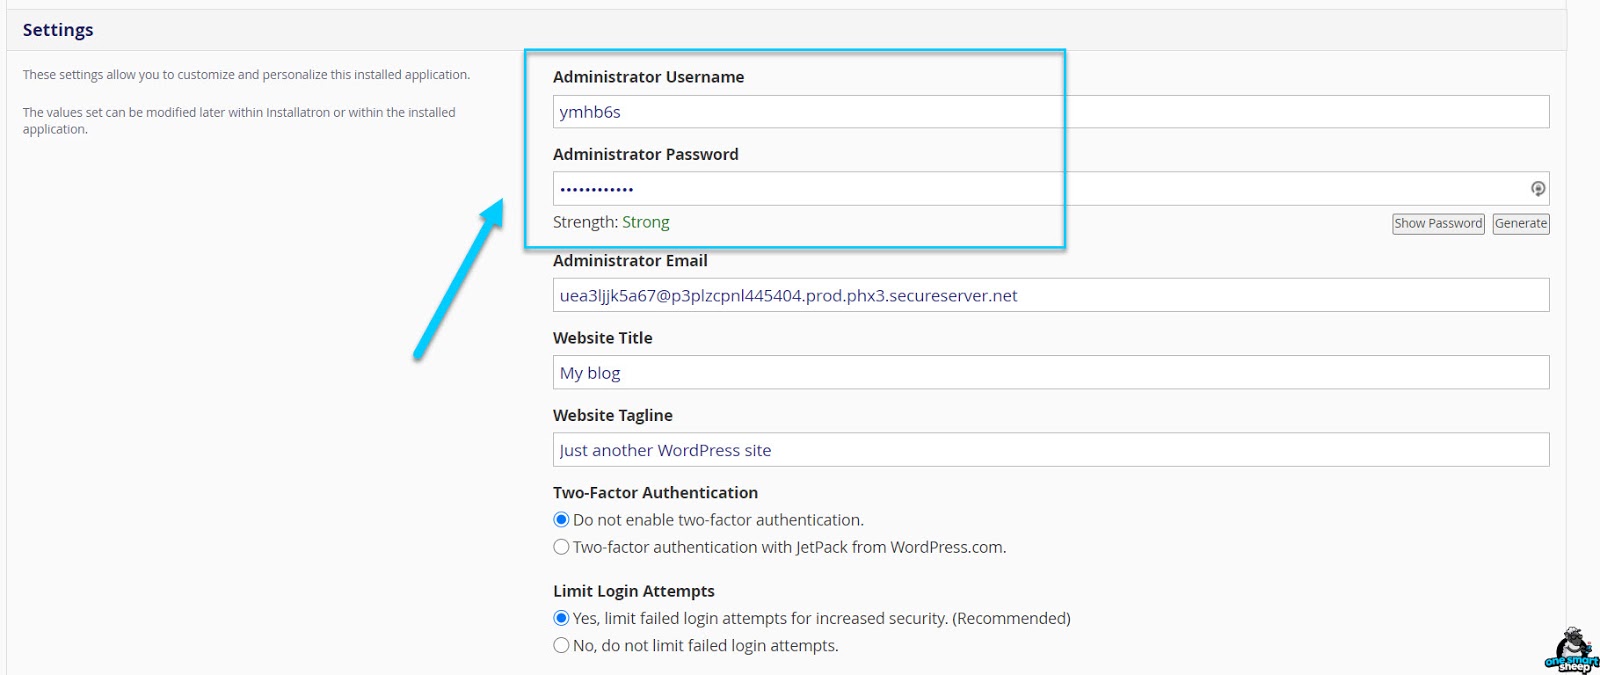
- Now, you must create a username and password to sign in to your WP website.
- To start the installation process, click on “Install” . It will only take a few seconds to complete.
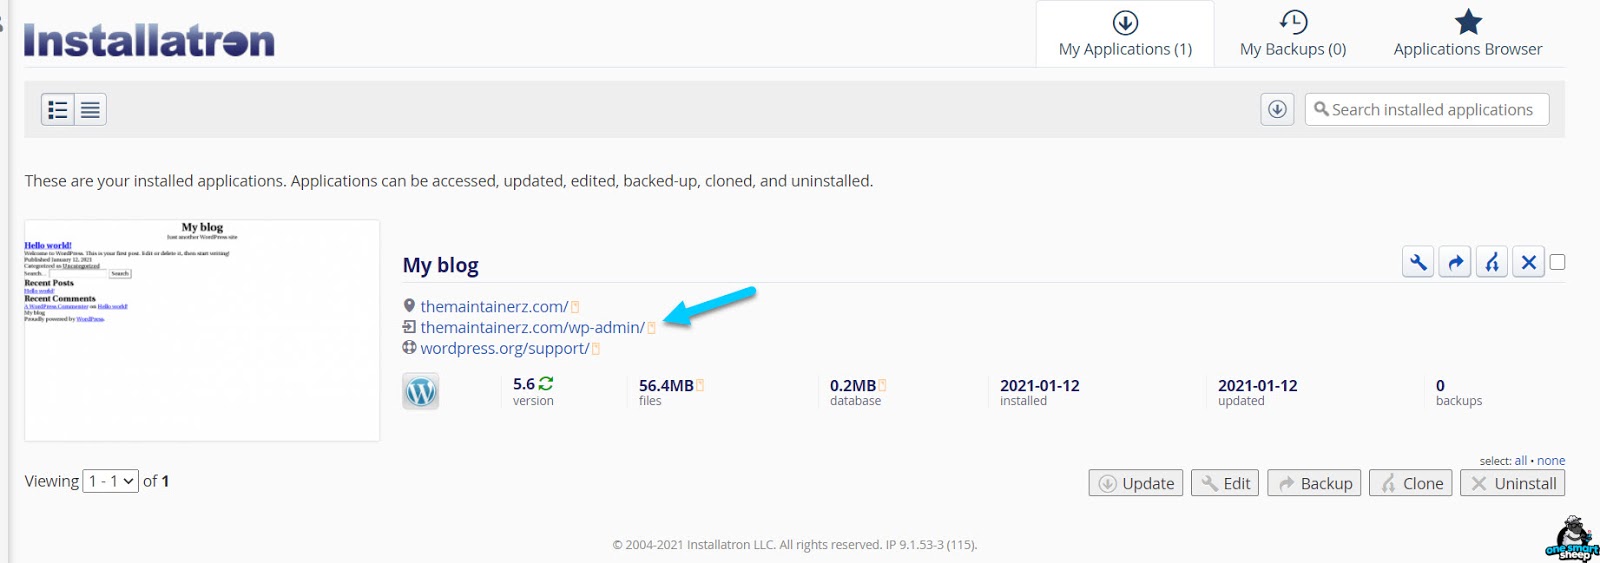
- After the installation is complete, you can click on the link that ends with “/wp-admin” to access the dashboard. Use the credentials you created earlier to log in to WP.
Free Installation Of SSL On GoDaddy WordPress
Want your website to have HTTPS instead of HTTP? You can encrypt it with SSL, and that too for free. Here’s how:
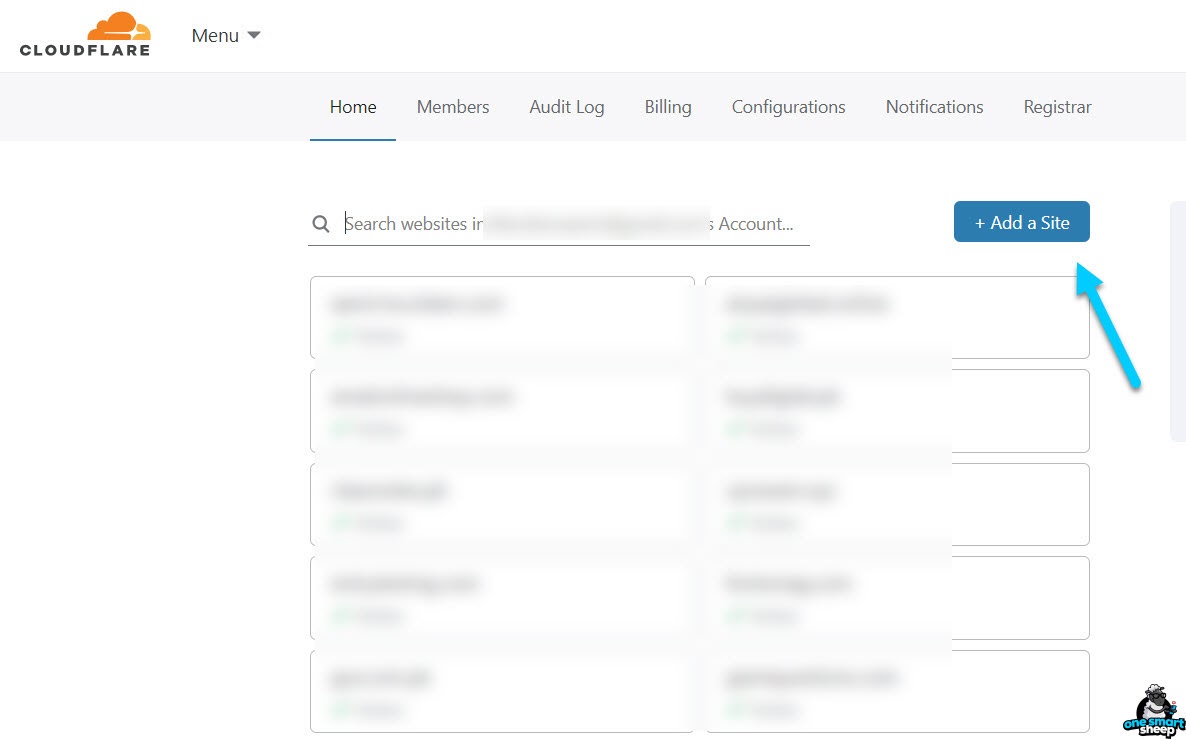
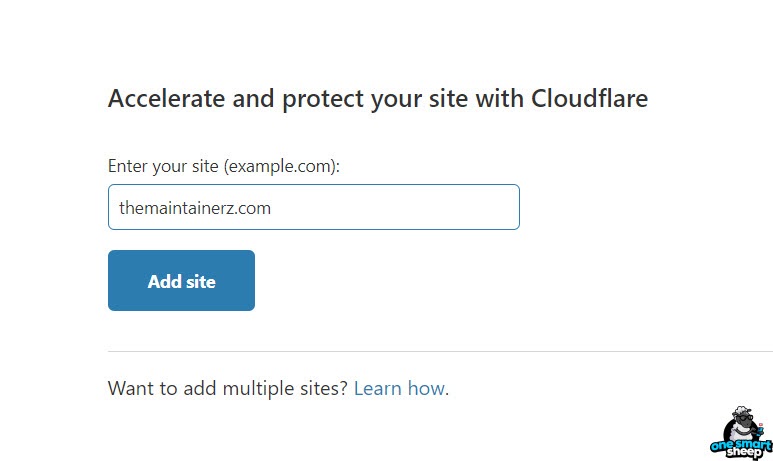
- Login to Cloudflare if you have an account already. Create an account if you don’t.

- Click on “Add a site,” enter the name of your website and then hit “Add site.”
- To get free SSL, choose the free plan and click “Continue,” and then again click “Continue” on the DNS screen.

- Now, copy the name servers that Cloudflare provides and insert them into the server of your domain registry.

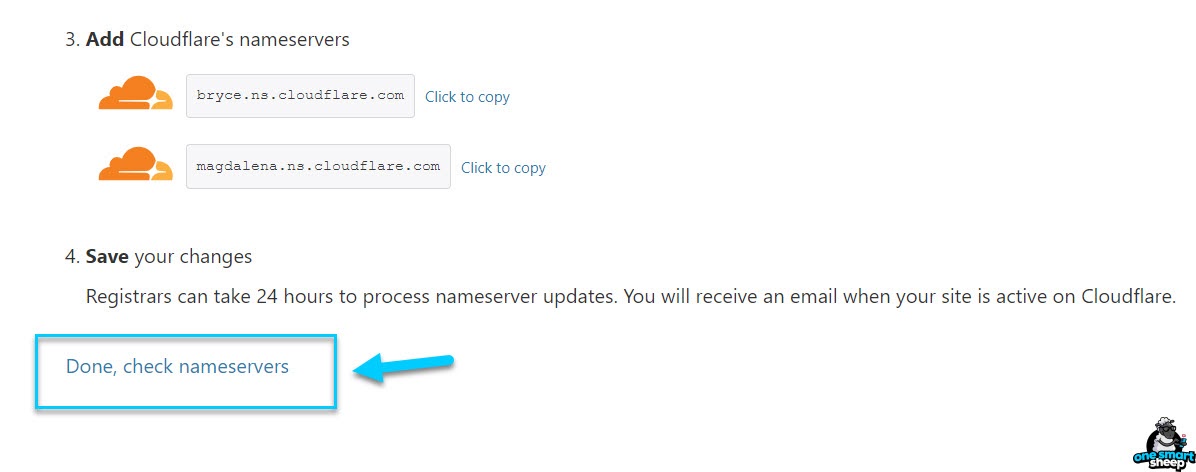
- Click “Done, check nameservers” and use the settings in the image below for your domain. It will ensure a smooth installation process.
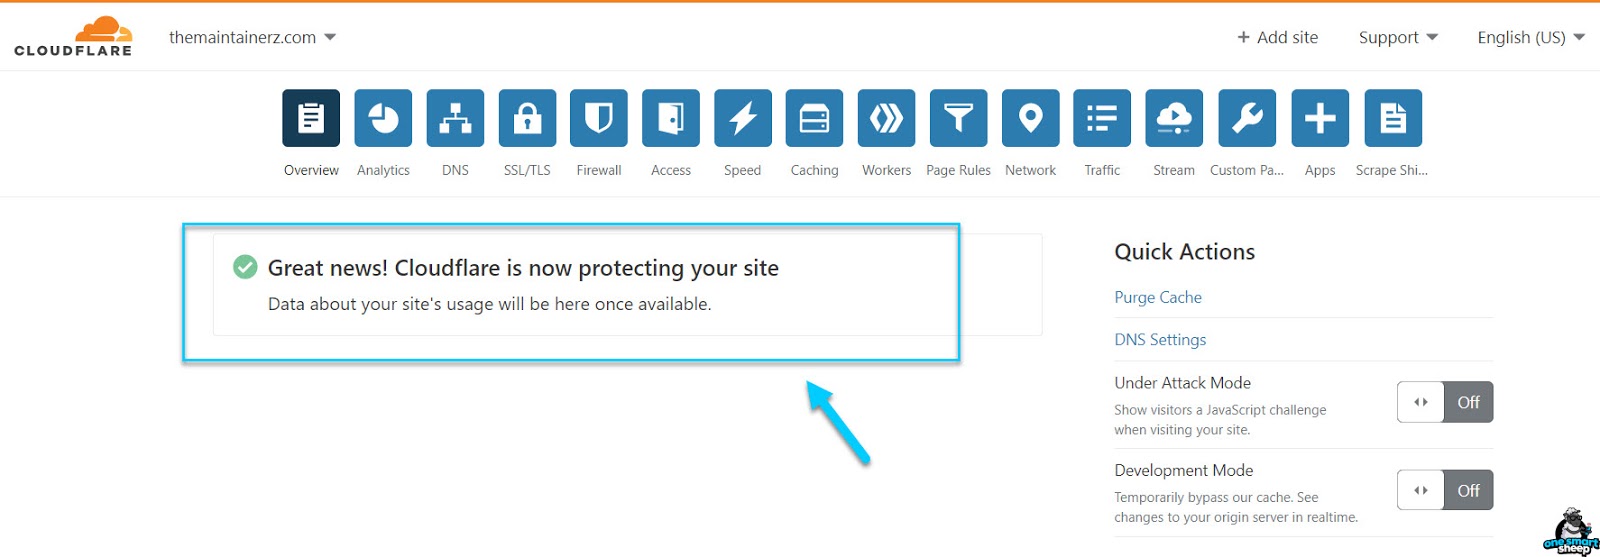
- Again, wait for DNS propagation to complete and then refresh the website. You will see a message like this:
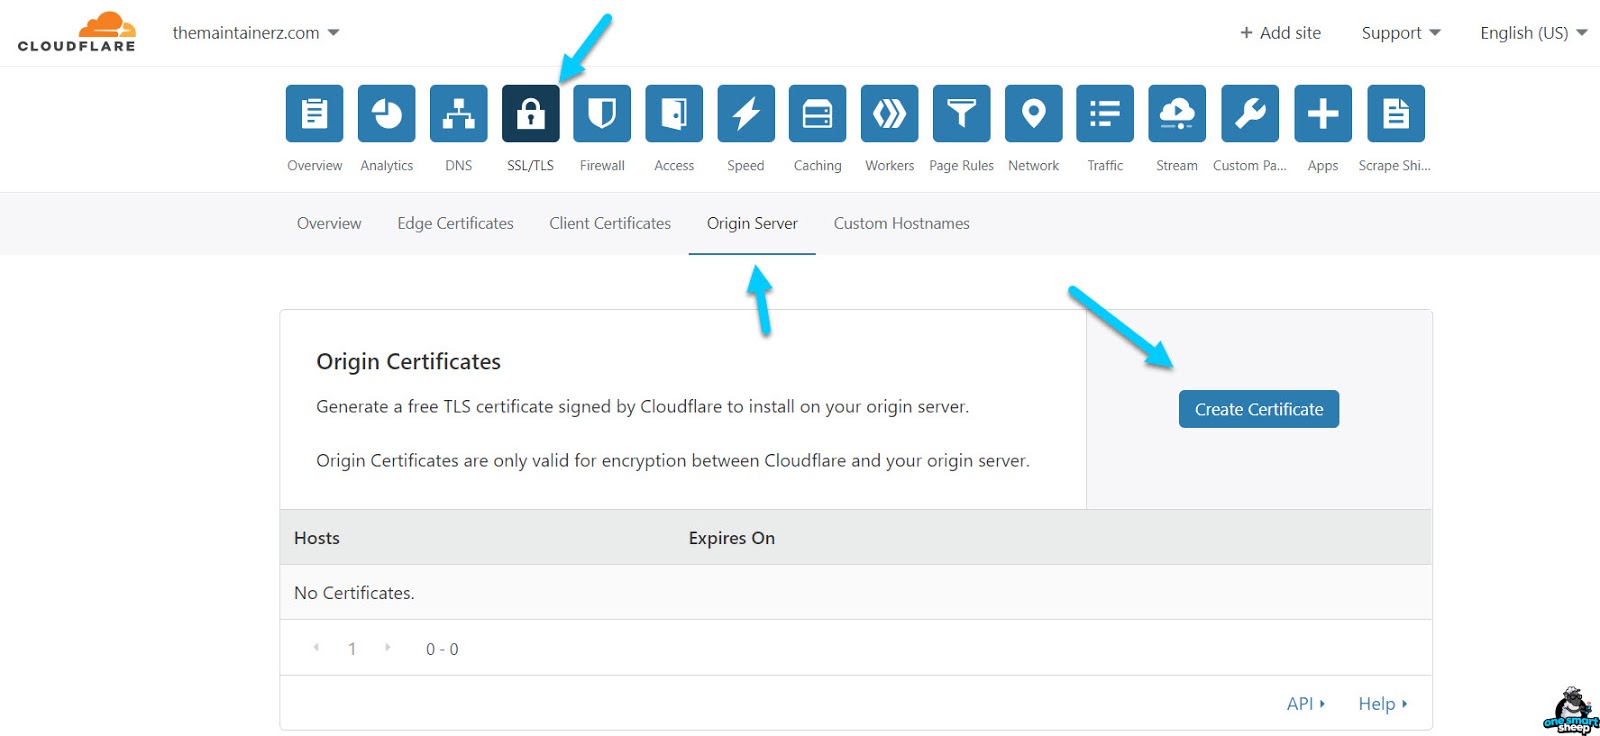
- Now go to the SSL/TLS section in Cloudflare and select the “Create Certificate” option.
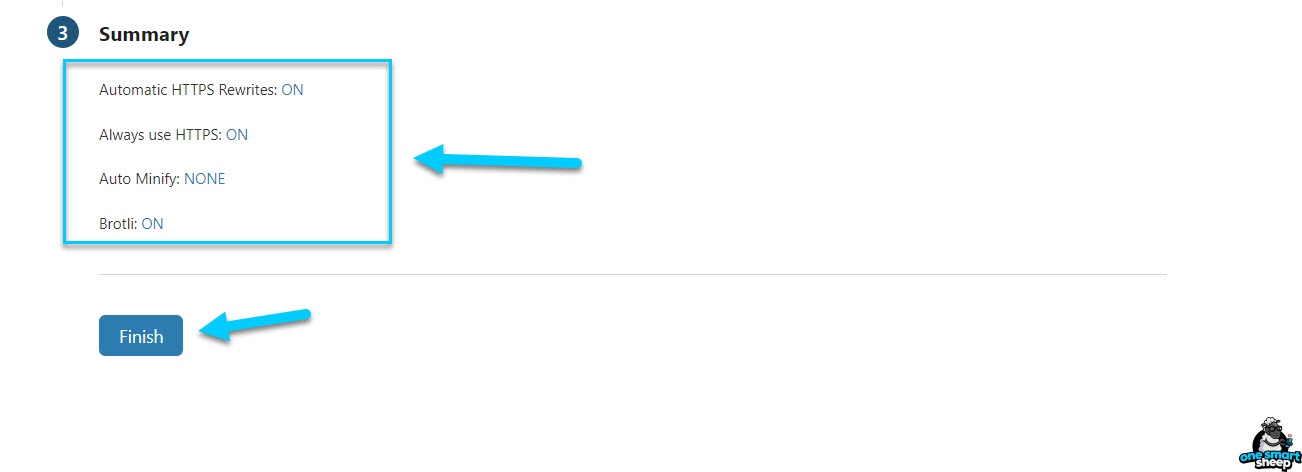
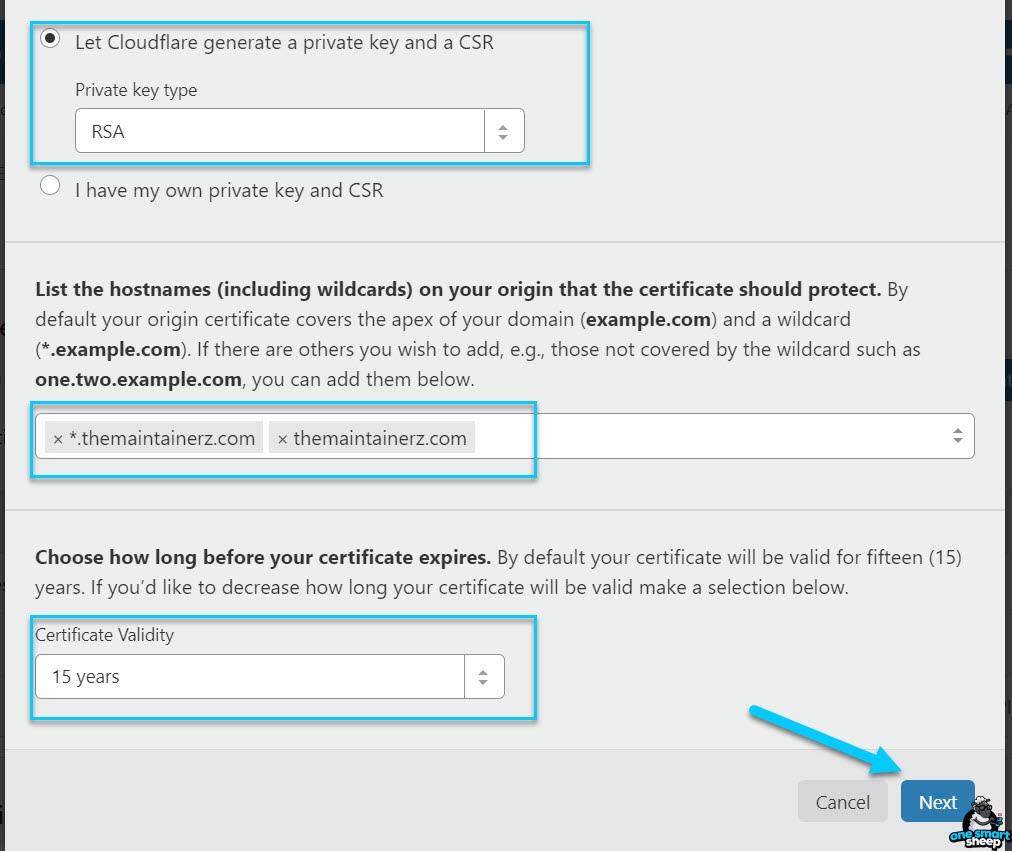
- Get 15 years of free SSL by selecting the following options in the image.

- After selecting the options, go back to “My Account” in your GoDaddy profile and select “Manage.”
- Select the “cPanel Admin” button to allow the installation of SSL certificates.
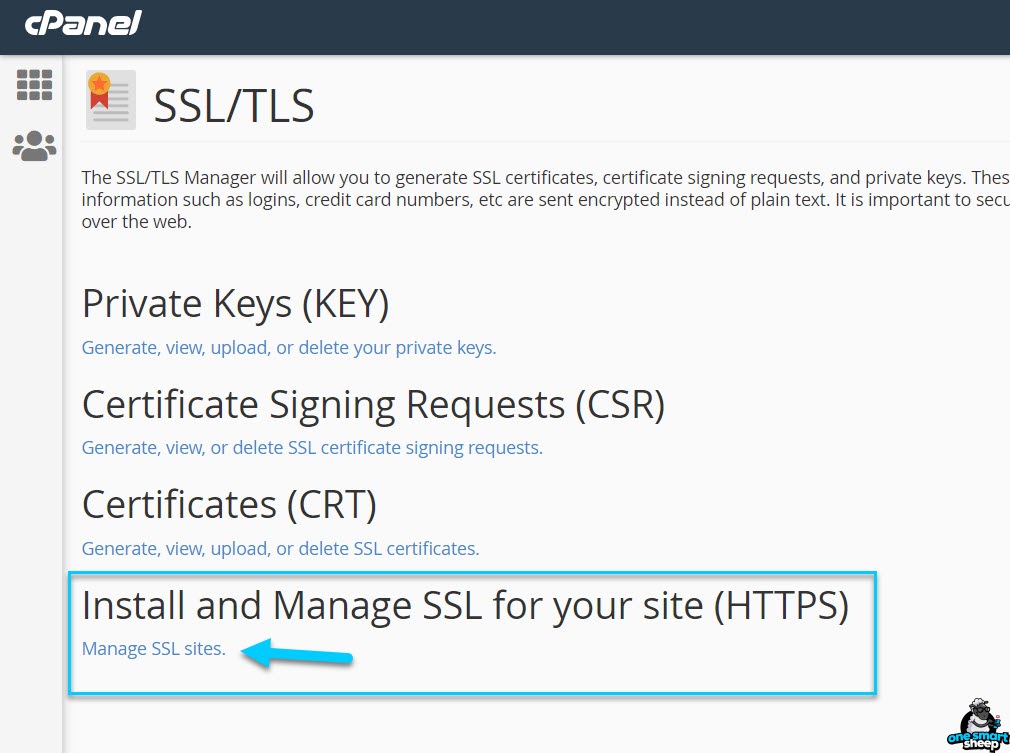
- Search “SSL” and select “SSL/TLS” from the options.

- Now click on “Manage SSL sites.”
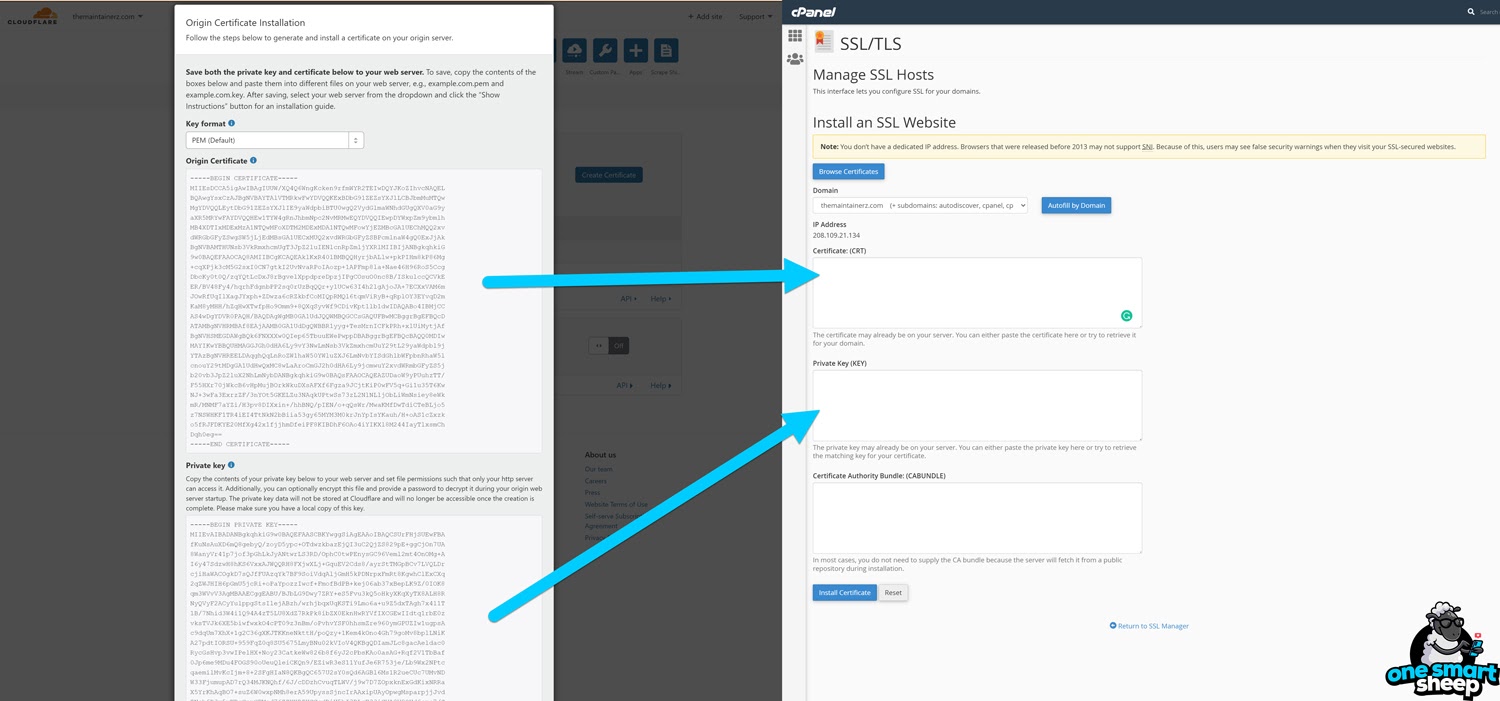
- You need to copy and paste the PEM key from the earlier settings. Refer to the image below to do it the right way.
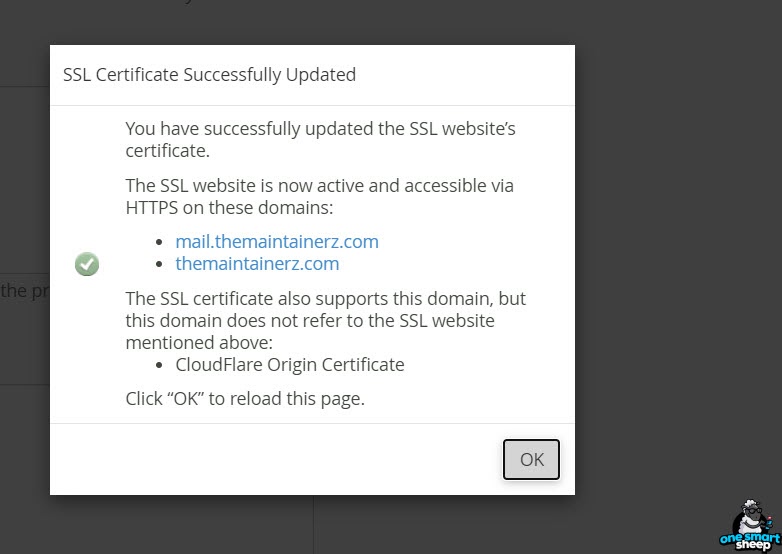
- Now, all that’s left is to “Install Certificate,” after which you will get a message saying: “SSL Certificate Successfully Updated.”

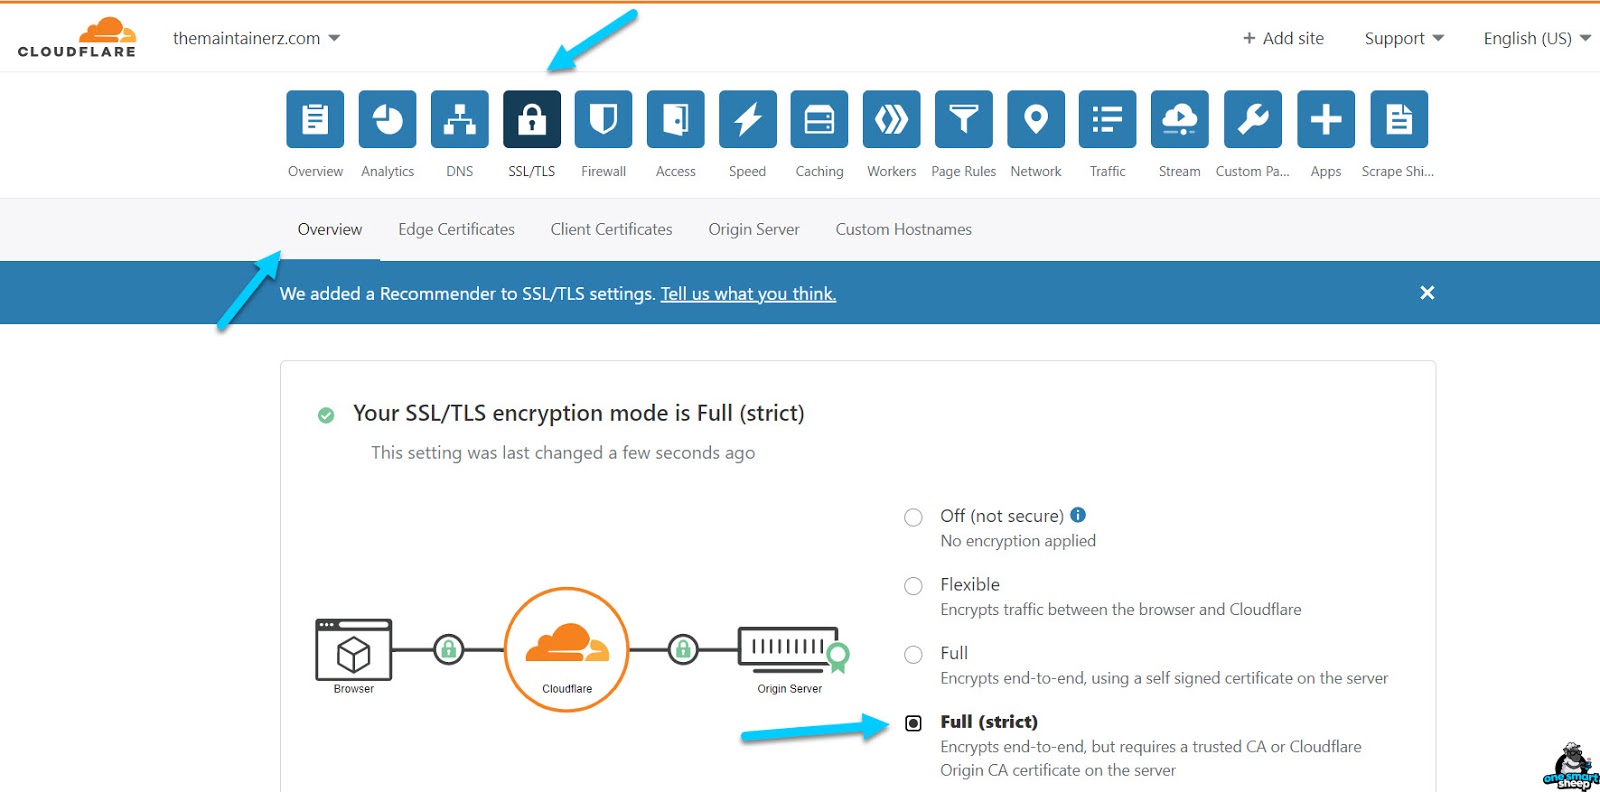
- Finally, go back to Cloudflare and navigate to “Overview and select Full (Strict)” under the “SSL/TLS” option. Selecting this option will make Cloudflare handle the SSL requests. You can avoid this option if you want GoDaddy to handle it.
Conclusion
We hope that the guide was able to help you with the installation process. If there are any other questions related to the installation, feel free to ask us in the comments. We will try to answer each of your questions to the best of our effort.
In the meantime, you can also read our other blogs for similar guides and tutorials for Shopify, WordPress, Wix, and many similar platforms.