Your website defines your identity and work. Every time an individual lands on your page, the first thing they will notice on your website is the header. Although security and speed are the most important aspects of customer retention and safety, the header helps increase engagement for new or regular customers. Are you curious regarding how to edit Header in WordPress? Well, it is obvious that if you want your website to have its own uniqueness, then a custom WordPress header is the key. This blog will cover how to edit WordPress Header with/without a plugin. Time to explore everything about how to edit Header in WordPress.
How To Edit Header In WordPress? (3 Easy Steps)
To edit header in WordPress, you mustn’t get overwhelmed with everything in front of you. Editing and customizing a header in WordPress can be done in three simple steps. We at Zone Websites offer professional website creating services and the best logo for your companies which will work as your brand identity.
Here are the three simple ways to explain how to edit Header in WordPress.
Use The Editor
The best way to personalize your WordPress header is using the WordPress editor. You may be able to perform this task by going to Appearance > Header, and this all depends upon your theme.
But in most cases, you will have access to it by navigating to Appearance > Customize. Within the editor, you are eligible to change your header image and edit your site title and tagline. In some of the rare themes, these elements will be available in the Site Identity Tab.
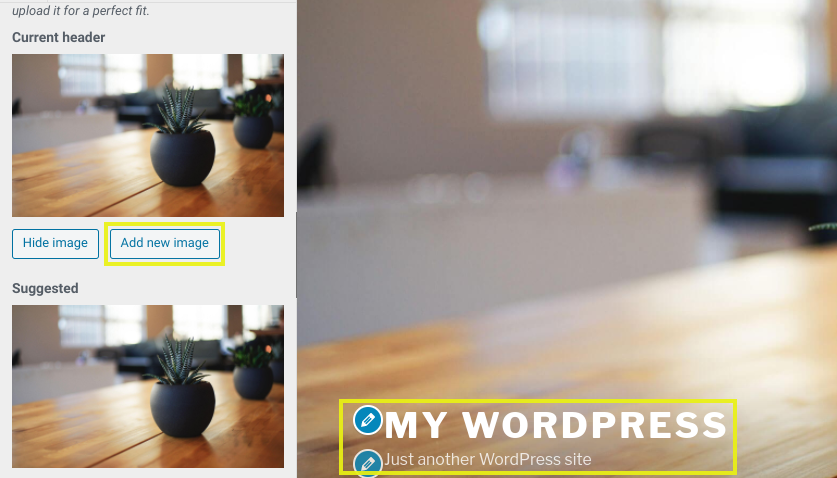
The advantage of using the editor is that you can skip the coding part if you are not in the mood or unfamiliar with it. You can also spot your new changes in the live preview panel on the right.
Change Your Theme’s Code
One of the other options for editing your WordPress header is by directly customizing and changing the codes of the respective theme’s files. You can have better control over the editing through this process, but you definitely need some coding ability. Before you start with the editing, it is recommended that you form a child theme.
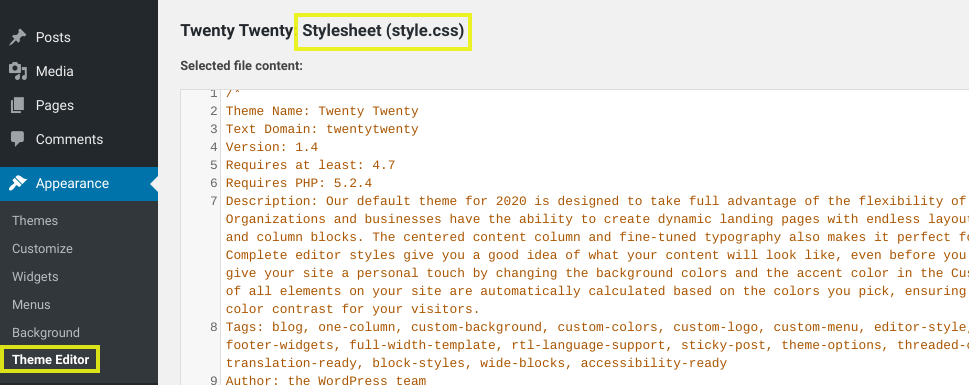
For customizing your header’s code, go to Appearance > Theme Editor and open the style.css file:
You can do the addition and removal of code within the Site Header section for this file:
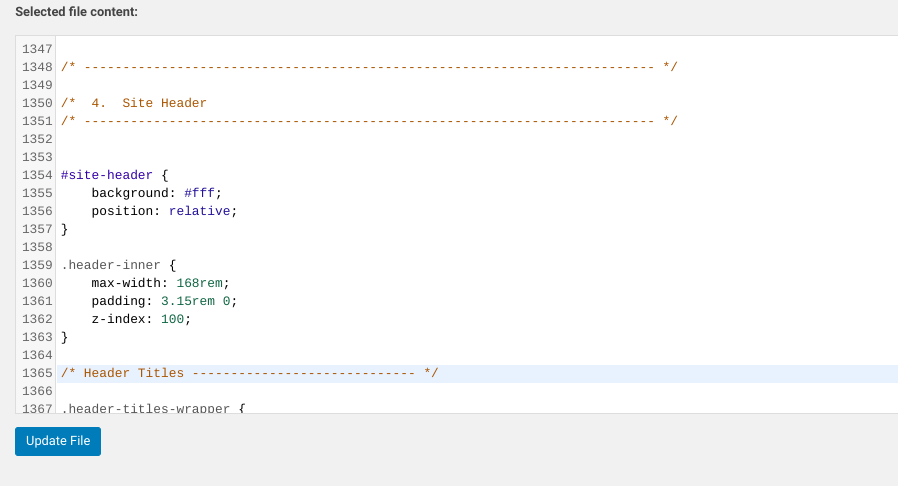
The commands which are favorable for this process, although not limited to:
- font: italic; Helps in changing the font style to italic.
- Background-opacity: .5; Helps in changing the opacity of the background (0 is fully transparent and 1 is not transparent at all).
- Font-size: 10px; Used for modifying the font size of the header text (change the px per your convenience).
- Padding: 10px; Preferred to change the padding or space close to the header (change 10 as per your convenience).
- Border: 20px; Used for forming a border around the header.
- Border-color: white; For changing the border color to white (you can even use hex code).
- Line-height: 20px; Set space to match the font size using this command. It can be beneficial in case you are using a larger font, which is overlapping on link breaks.
If the newly formed code is non-functional, try adding! Important at the end of the command, for example, padding-left: 0 ! important. In case this doesn’t work, your header will not be able to get a named header. Some WordPress themes use “masthead,” “inline-header,” or even the other labels in some cases.
You can also make changes in the header.php file if you feel it is a requirement. But, this code only deals with the functioning and not the styling. Many individuals looking to edit their headers are mostly interested in updating their site looks. They don’t bother with knowing what’s happening in the back scenes; even in your case, you will mostly focus on its CSS.
Read Also: How To Unpublish A WordPress Site? A Step-By-Step Process
Try Installing A WordPress Edit Header Plugin
One of the simpler ways to edit header in WordPress is through a plugin. This method is especially for those who don’t want to bother with editing the site’s files directly.
You can search for various tools depending on your experience and the specific customization you want for the site. Insert Headers and Footers is one of the most popular free plugins in WordPress.

- When it’s ready to come into action, you can navigate it under Settings > Insert Headers and Footer.
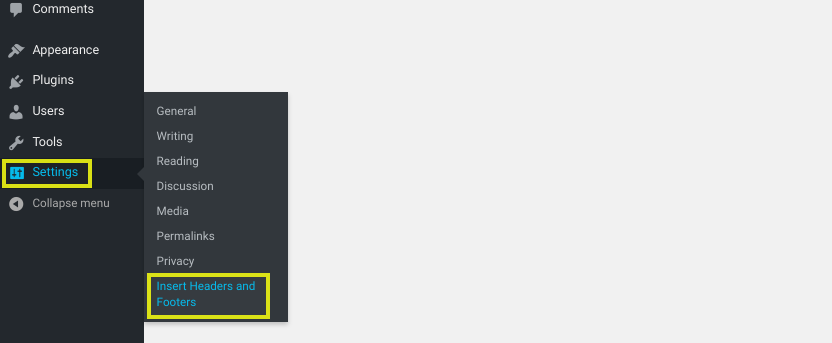
- Next, when in the header section, you can add code for anything you require to edit and remove from the header.

- The scripts you place will automatically get added to the ‘head’ tag of the WordPress site. After completing the entire process, press the Save Changes button.
- You can also use a premium custom header WordPress plugin such as Popping Sidebars & Widgets:
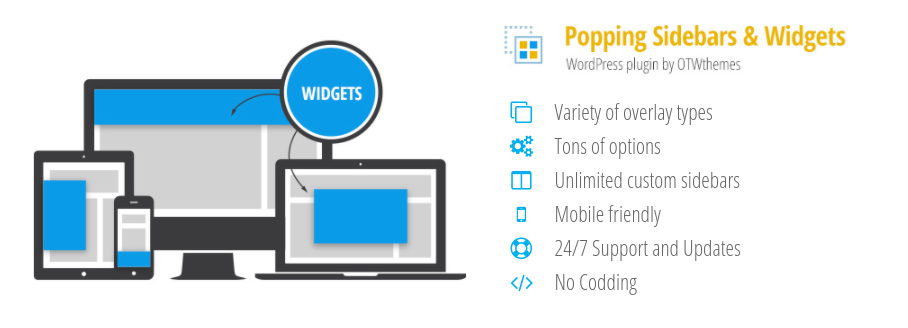
This plugin can assist you in creating widgets such as texts, forms, social media icons, and much more. If you are not a fan of codes, this plugin can be your best option, considering the edit header in WordPress. You can even edit your sidebar and footer area with it.
To Sum Up
All WordPress headers serve the same purpose for the owner. Having unique headers helps showcase to the users what your site contains and aids in forming a good first impression. For such reasons, Zone Websites recommends that you customize your header to define your brands and goals better.
Editing your WordPress header can offer aid in boosting the looks and functionality of your website. But if you have multiple sites, your work will become harder. At Zone Websites, we offer the best website creation plans to boost your market value significantly. Our experts also offer logo design services to make your website look exotic and attractive. Visit our websites to check our affordable, top-quality services catering to your needs.
