Are you looking for How to Install Google Tag Manager in WordPress? Numerous reasons make Google Tag Manager (GTM) an essential part of digital marketing, but what makes it best is it assists in consolidating all your scripts into one precise location. If you own a small business site, there are chances that you may not contain many engineering resources for pushing your tracking code to the WordPress website. Whereas, if you run a large organization, pushing a normal script to production is a huge cost, risky, and bothersome for the engineers.Google Tag Manager is a tag management tool that allows you to easily consolidate and push all your marketing tool scripts by using a user-friendly interface. This tool assists in setting a range of tags such as Google Analytics and Google Adwords.
This tutorial will explain how to install google tag manager to WordPress, which will hardly take any of your precious time.
Setting Up The Account
Before proceeding with the process of the install tag manager on WordPress:
- Start with installing Google Tag Assistant Chrome Extension. This specific tool is really beneficial for not only the setup of Google Tag Manager but also for debugging numerous other tracking tools.

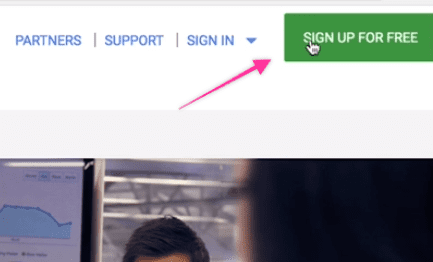
- Follow by signing up for a fresh account on Google Tag Manager, in case you haven’t done it yet:
a) If you are new to creating a Google Tag Manager account, you will get directed to create one.
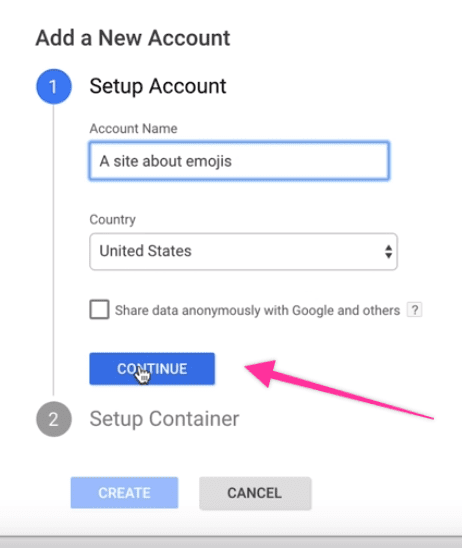
b) You are currently eligible for writing your company’s website and the company’s name for both the container and account.
c) Choose the name of your country.
d) For proceeding further, press “Continue”.
e) Fill out the container name (the real website)
f) In the section under “Where to Use Container”, choose “Web”.
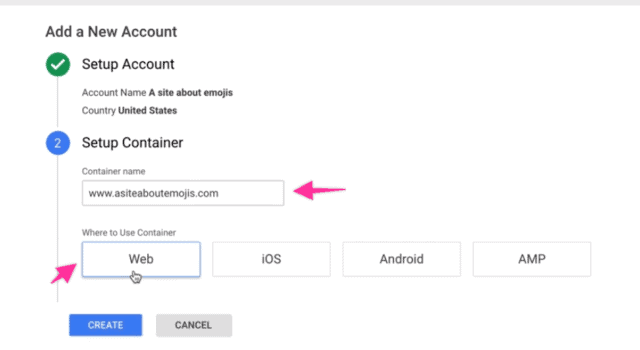
g) Accept all the terms of services (Read them if you are interested)
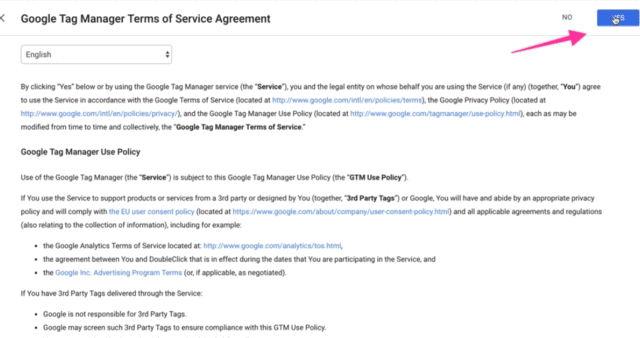
- When you are done with the process of setting up Google Tag Manager, the current platform will provide you with Two Google Tag Manager codes. You can use two methods to continue further:
a) Follow the instructions given on the page:
- The first GTM code snippet: they will request you paste it high in the opening body tag section of the HTML as possible. You have to perform this for all your site’s web pages.
- The second GTM code: they will request to paste this without delay with the opening of the <body> tag.
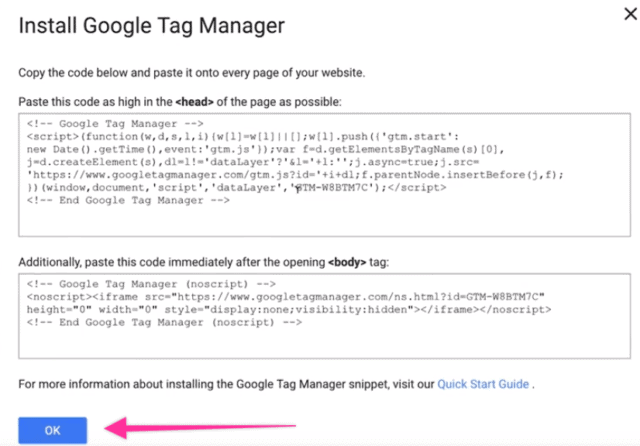
- Don’t forget, in case you are hand-coding or designing your website and want to paste the code inside, you can surely do that. However, if you are using WordPress, then we got a better convenient method which is as follows:
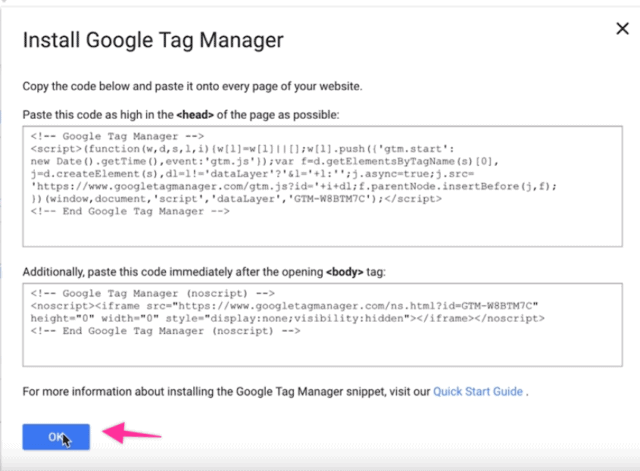
b) Don’t follow the instructions on the page and rather continue by following this easier method:
- Click the “OK” button while not touching anything related to codes that you get offered by them on first sign up for Google Tag Manager.
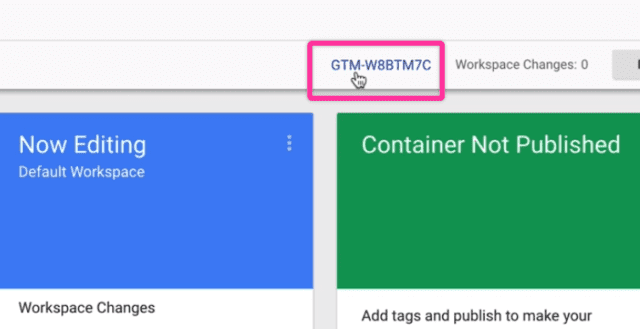
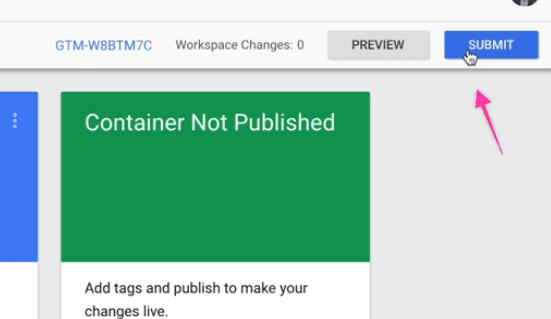
- With the opening of your Google Tag Manager dashboard, firstly, you will notice your Google Tag Manager ID (on the top). Press right-click on it and copy that as a note for later when you proceed with the process of how to add tag manager to WordPress.
- Press the ”Submit” button present at the top right-hand corner.
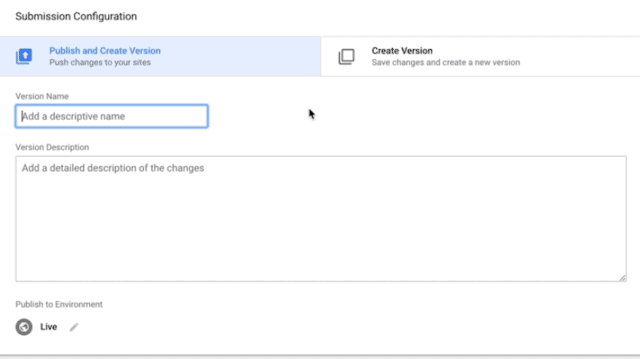
- With the pop-up on the screen, you will get permission to add Version Names and Descriptions of the Google Tag Manager containers. This will surely be beneficial for future use when you decide to push more Google Tag Manager containers, but you can leave it as it is for now.
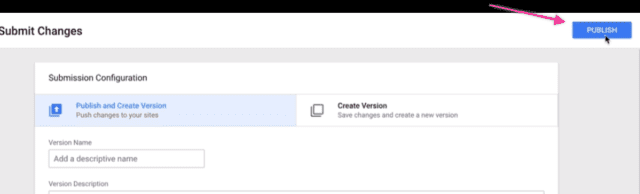
- Press the “Publish” button from the top of the page to push the GTM container.
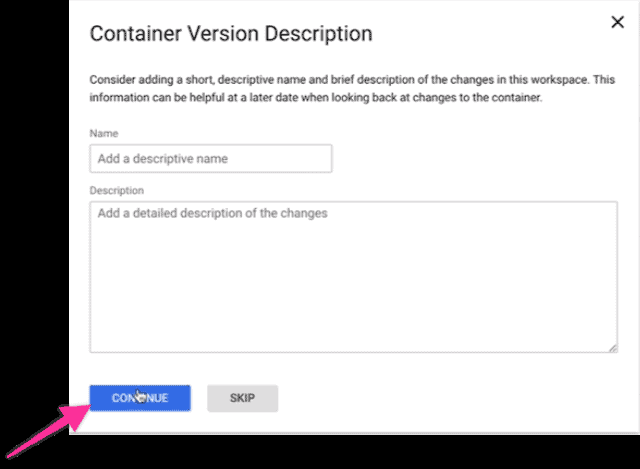
- You can skip the description and press “Continue”. With that, your Google Tag Manager is live now.
Read Also: How To Install WordPress On HostGator? A Complete Guide
How To Add Tag Manager To WordPress?
Since you have completed the Google Tag Manager account set-up and published the first container, let’s set this up in WordPress. To start this, you must install a WordPress plugin and continue editing the custom HTML theme a bit.
- Proceed to your WordPress Dashboard
- Continue the step by going to Plugins → Add New.
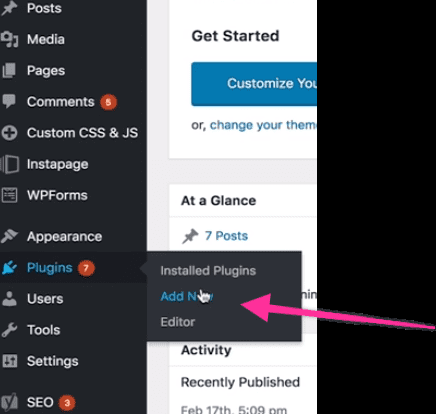
- Advance to the search bar present in the upper right-hand corner of the screen, under the word “keyword”, and search for “Google Tag Manager”.
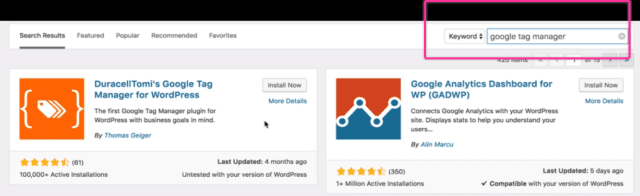
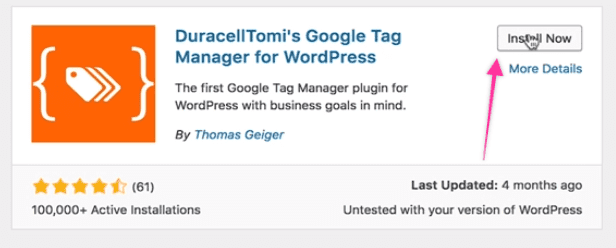
- You will get presented with various options and most of these works. However, the most convenient one and the one which we are going to use for the tutorial is the first one in the result bar called “DuracellTomi’s Google Tag Manager for WordPress”.
- Advance by clicking “Install now”.
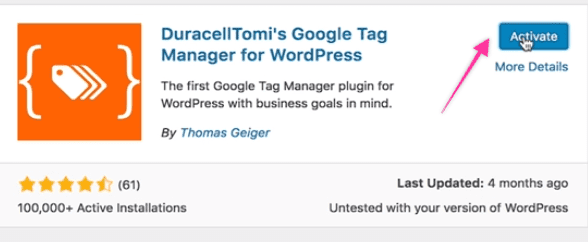
- When the installation process is over, press “Active”.
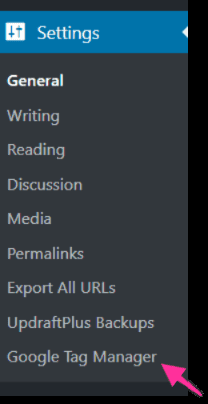
- Advance to settings down, present on the left-hand side corner, and press on “Google Tag Manager”.
- Continue the steps by pasting the Google Manager ID you copied from the Google Manager Account earlier.
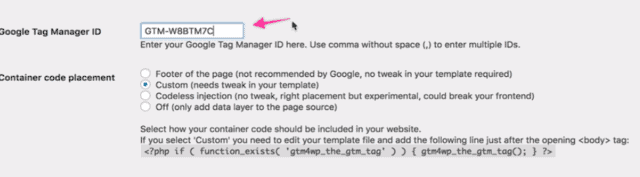
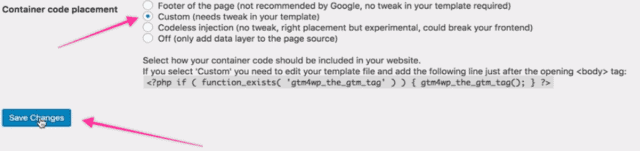
- You must leave the “Container code placement” to its default, “Custom”.
- Press on “Save Changes”.
- You need to tweak your WordPress template a little to get this to go. You only have to do this for the time, and once it starts working, you will be able to add and remove pixels ad nauseam permanently.
a) You need to copy the PHP code visible exactly above the “Save Changes” button.

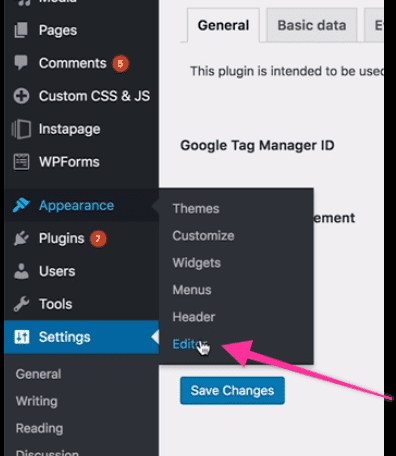
b) When on the WordPress theme sidebar, proceed to “Appearance” → “Editor”.
c) Ensure that you edit the WordPress theme you just installed on your site. You will find that everyone’s theme is a little different. However, we will show you the process to do it that will apply to maximum WordPress websites.
d) Press the “Theme Header” from the available list at the right. If you cannot spot the “Theme Header” in the present list, you can use CTRL+F or Command+F to find the “header.php” file.
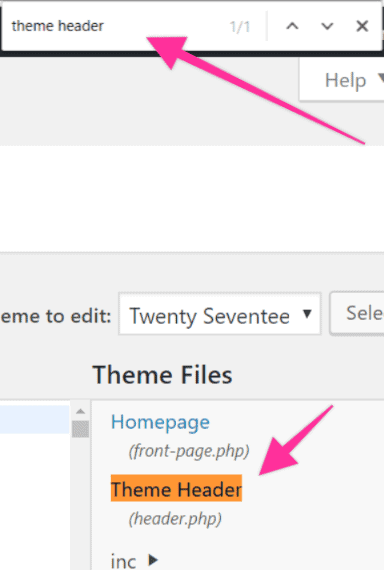
e) Search for the body tag – it’s generally present at the top if you fail to locate it, press CTRL+F or Command+F and search for “<body”.

f) Press Enter right after the tag.
g) Paste the snippet of PHP code you received from the Google Tag Manager plugin.
![]()
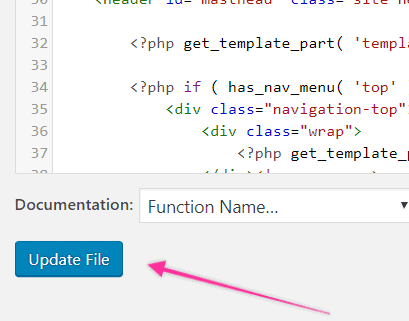
h) Continue this by scrolling down and pressing the “Update File”.
Searching The Errors
Since you are done with the setup process of Google Tag Manager and its installation on the WordPress website, it’s time to check the errors. This process is also called quality assurance or “QA”.
- Advance to your website
- Head to the Google Tag Assistant plugin you installed earlier and continue by clicking on it.
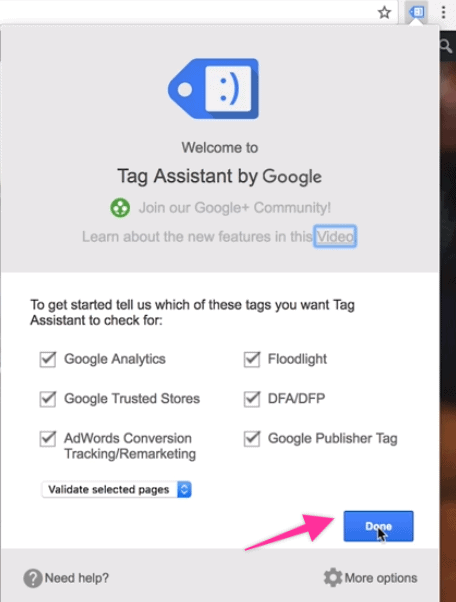
- Don’t change any settings and leave them on default.
- Press “Done”.

- Press “Enable”.
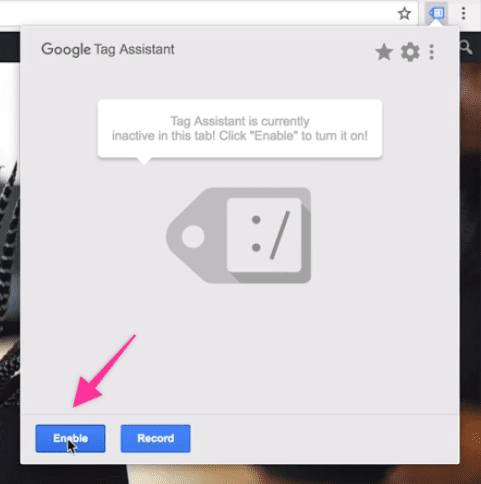
- Continue by reloading the page, and you will notice that Google Tag Manager is working.

And this is how the process for how to install Google Tag Manager in WordPress comes to an end. By this, you will have permission to add new tags and track and remove every pixel, tool, event, and page view on your website, which will assist in managing your digital marketing endeavors.
To Conclude
The process of how to install tag manager on WordPress becomes much easier if you follow a step-by-step guide like this.
As we know, creating a website is such a hassle. For such a reason, taking the professional help of a company such as Zone Websites can be beneficial. Besides website creation services, we also offer logo creation services that represent your brand to the masses. Contact us if you want a professional website that can help you increase user engagement and gain more profit.