Installing an SSL certificate is necessary if you want to manage sensitive and personal data like credit card digits on your website. With this, you will be sure that all the data interchanged between the web server and your visitor browser is encrypted. In this step-by-step guide, we will see how to install an SSL certificate in GoDaddy cPanel using a sub-domain. You can use these same steps for a domain as well. To simplify, we will use the sub-domain “whmcs.webshotingshed.com” throughout the guide on how to install SSL certificate in GoDaddy cPanel.
Step 1: Getting An IP Address
To start this process, assign your domain a dedicated IP address. Because without a dedicated IP address, you cannot install an SSL certificate. If you have root access, you can do this step yourself. Otherwise, you may require the help of your hosting provider.
A) Allotting An IP Address To A Domain
To start with allocating an IP address to the domain, head towards “WHM > Change a Site’s IP Address.” Choose from the list of domains and select the “Change” icon. When you land on the next page, you may choose your IP address from the list.
B) Allotting An IP Address To A Sub-Domain
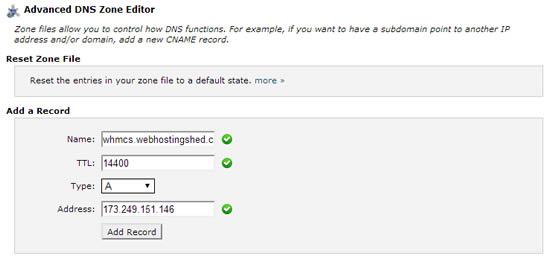
In case you are using a subdomain, you have to proceed with some minor changes in steps. After allocating an IP address, you have to add an “A record” to the DNS zone file of a sub-domain. Head towards the cPanel > Advanced DNS Zone Editor and proceed by adding the IP address and sub-domain:
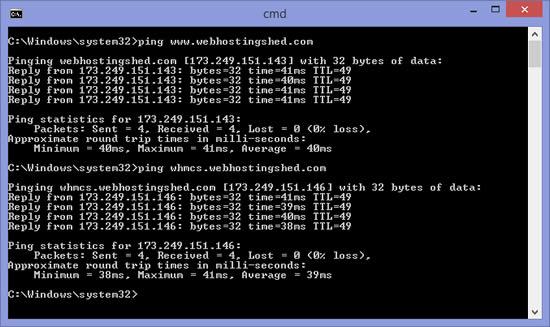
If you proceed with this step without any mistake, your subdomain will operate on a different IP address compared to the primary domain:
Step 2: Create A Certificate Signing Request
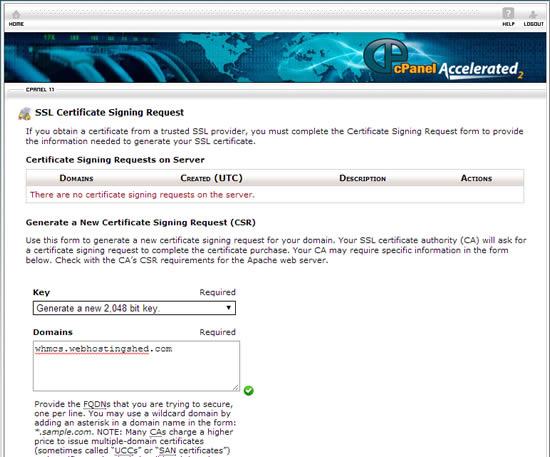
Before proceeding with the step of installing the SSL certificate, you have to create a CSR (Certificate Signing Request). To do that, head towards “cPanel > SSL/TLS Manager > View, generate or delete the SSL certificate signing requests.”
Write down all the details about the company with the sub-domain and click on “Generate.”
Now, copy the CSR you generated to your preferable text editor:
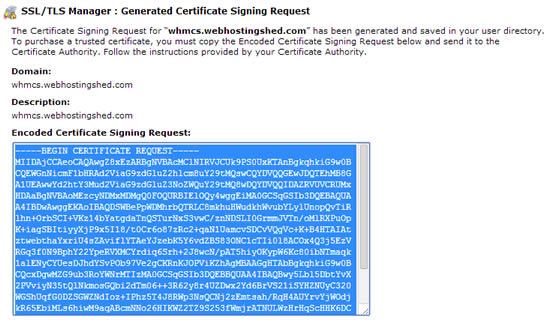
Step 3: Configure The SSL Certificate From GoDaddy
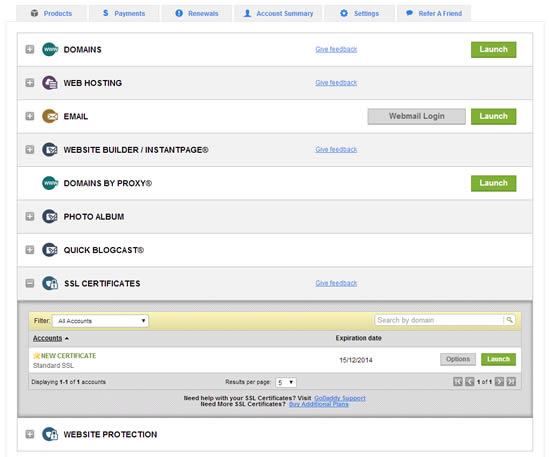
After completing step 2, it’s time to log into your GoDaddy account. Upon logging in, press on the “Launch” tab available next to the SSL certificate:
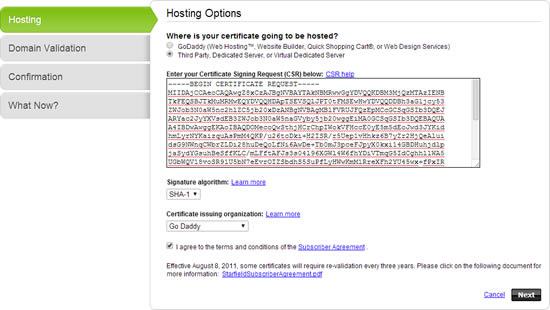
When you are on the next page, choose anyone from “Dedicated Server, Third Party, or Virtual Dedicate Server.” After selecting one, proceed with copying the CSR in the box. Check the box about terms & conditions, which you will see on the bottom, and press the “Next” icon:
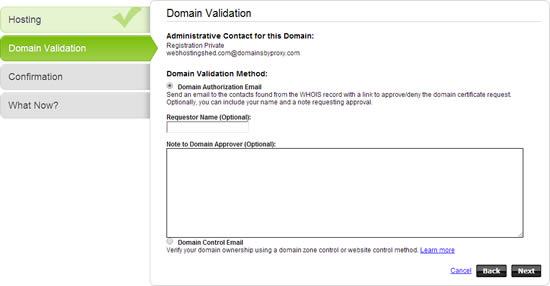
You have to click on “Domain Authorization Email” in order to have the request authorized by the owner of the domain. After that, press on “Next” tab:
To confirm all your previous steps, press the icon “Next” available on the next page. If all the steps are followed properly, the domain owner will get a request for approval by the email containing a link for proceeding further:
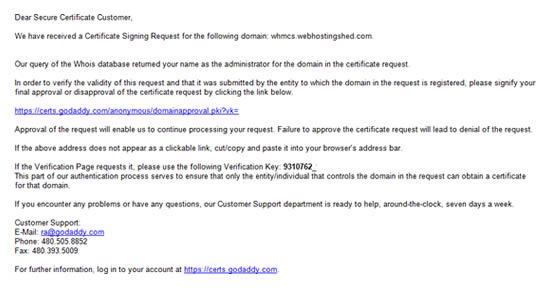
To approve this request, you have to click on the link that came with the email:
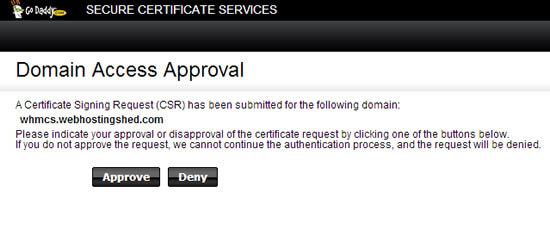
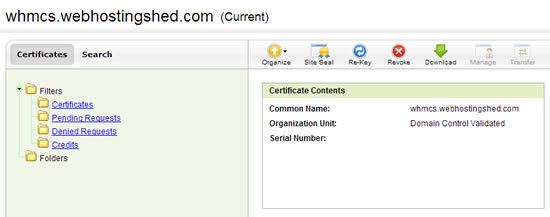
Upon the confirmation of the certificate, you will be redirected back to the “Secure Certificate Services.” Press on the “Download” button in order to get the certificate download to the desktop:
Now from the drop-down list, you need to select the “cPanel.” Proceed by clicking on the “Download” button:
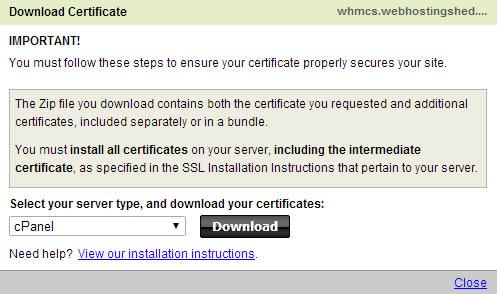
Extract the “two (2) .CRT files” from your downloaded zip archive.
Read Also: How To Delete A GoDaddy Account? [Step-By-Step Guide]
Step 4: SSL Certificates Upload
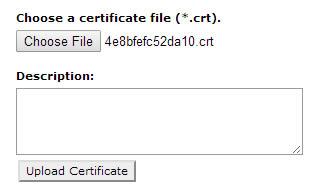
In order to upload your SSL certificates to the cPanel account, head toward “cPanel > SSL/TLS Manager > View, upload, or delete the SSL certificates” and continue by uploading the “two .CRT files”. Remember that you can only upload one file at the same time.
Step 5: SSL Certificates Installation
For performing such a procedure, you are required to gain root access to the server. In case you don’t have access, contact your web hosting provider or server administrator so that they can perform this step for you.
For installing the SSL certificates on a domain, head toward “WHM > Install an SSL certificate on a domain” and press the “Browse Certificates” button. From the given list, choose the account of the domain owner. With this, you will be able to see two certificates that you uploaded using cPanel.
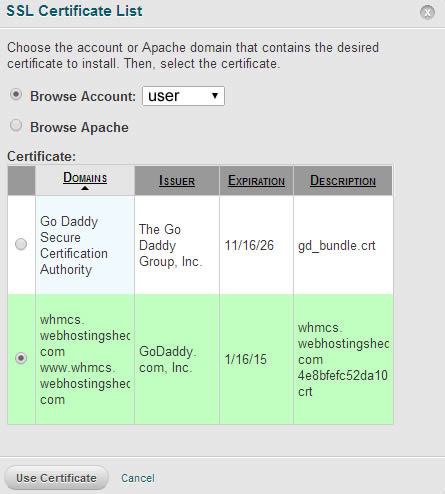
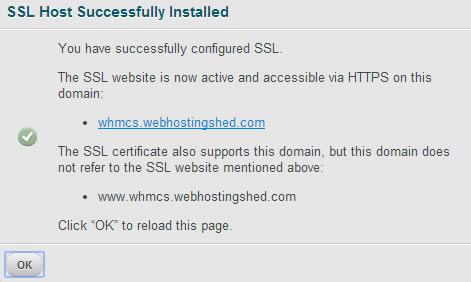
You can install certificates by choosing them and pressing the “Use Certificate” button. However, you can only install one certificate at the given time. With the installation of the certificates, you will receive a confirmation message such as:
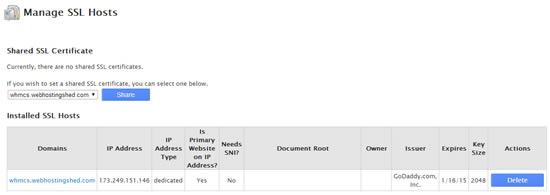
When you visit “WHM > Manage SSL Hosts,” you will notice the domain listed:
Step 6: Implying A Secure Connection
In case you enter the website by using “https://”, you will have a secure connection. But this doesn’t mean visitors cannot access your site on a non-secure connection such as “http://”.
To redirect the website visitors to a secure portion of the site, you are required to upload a file “.htaccess” at the root of the domain’s public directory by using the proceeding content:
<IfModule mod_rewrite.c>
RewriteEngine On
RewriteCond %{HTTPS} off
RewriteRule ^(.*)$ https://%{HTTP_HOST}%{REQUEST_URI} [L,R=301]
</IfModule>
This command will only direct visitors toward the site’s secure area, regardless of what URL has been used.
Summary
In this guide, we came to know about how to install an SSL certificate in GoDaddy cPanel.
To install an SSL certificate on GoDaddy, you just simply have to follow these six easy steps. Enhance your security by installing an SSL certificate on GoDaddy cPanel today!
Zone Websites is a trusted digital partner and has been in the business of supporting businesses and entrepreneurs by offering our valuable services. Here you can get the best services in web development, logo designing, email marketing, and digital marketing.
To gain new heights in your business, having a partner like Zone Websites is a necessity. Send your query today, and we will get back to you as soon as possible.
